
There’s something comforting about preparing a wholesome snack with simple ingredients. Whether it’s a busy weeknight or a quiet weekend morning, making granola bars can offer a welcome break. They’re incredibly versatile, fitting seamlessly into breakfast routines, afternoon snacks, or even packed for family outings. With a few easy steps, you can create these bars that are not only nourishing but also flexible enough to satisfy a variety of taste preferences. Let’s dive into making these hearty bars together.
Why You’ll Love This Healthy Sourdough Granola Bars
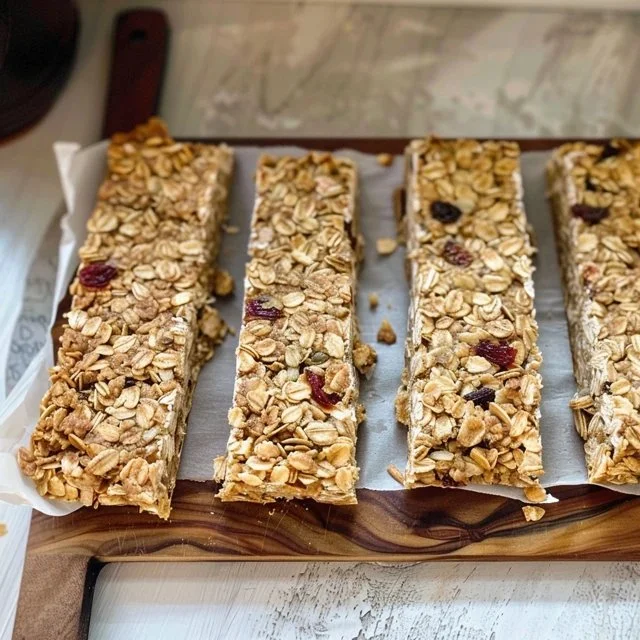
These granola bars are easy to prepare and rely on familiar ingredients. They offer a balanced flavor and a comforting texture, making them appealing any time of day. With their blend of chewy and crunchy elements, these bars ensure you have a delightful snack that’s straightforward to whip up on busy days or leisurely weekends. The practicality of this recipe makes it a great addition to your everyday cooking.
Kitchen Tools You’ll Need
- Mixing bowl
- Baking dish
- Spoon or spatula
- Parchment paper (optional for lining)
- Knife for cutting
Ingredients
- 1 cup sourdough starter (discard or active, contributes moisture and flavor)
- 2 cups rolled oats (provides structure and chew)
- 1/2 cup nuts or seeds (such as almonds, walnuts, sunflower seeds, etc.), chopped (adds crunch and healthy fats)
- 1/4 cup honey or maple syrup (natural sweetness and binding)
- 1/4 cup nut butter (such as almond butter, peanut butter, etc.) (adds creaminess and helps hold bars together)
- 1/4 cup dried fruit (such as raisins, cranberries, chopped apricots, etc.) (provides chewiness and natural sweetness)
- 1/4 cup chocolate chips or chunks (optional, for sweetness and richness)
- 1/2 teaspoon vanilla extract (adds depth of flavor)
- Pinch of salt (enhances overall flavor)

How to Make Healthy Sourdough Granola Bars
Step 1. In a large mixing bowl, combine the sourdough starter with the rolled oats. This mixture will form the base of your granola bars. Stir until the oats are fully coated and evenly distributed. The sourdough starter helps bind the mixture and infuses it with flavor.
Step 2. Next, add the chopped nuts or seeds to the oat mixture. Choose your favorite nuts or seeds for added crunch and nutrition. Mix well, ensuring an even distribution throughout the oats, which will enhance the texture and provide healthy fats.
Step 3. Incorporate the honey or maple syrup and nut butter into the mixture. These ingredients serve as the binding agent, so stir them in thoroughly until everything is well-combined and gooey. The combination should feel slightly tacky yet cohesive, providing a good structure for the bars.
Step 4. Add the dried fruit to the bowl next, mixing gently but thoroughly to ensure it is evenly scattered throughout. The dried fruit contributes both chewiness and sweetness, which balances the nuttiness of the granola bars.
Step 5. If you’re using chocolate chips or chunks, fold these into the mixture now. Though optional, they add an enjoyable touch of sweetness. Make sure they’re well-incorporated so that each bite can offer a hint of chocolate.
Step 6. Preheat your oven to 350°F. Line your baking dish with parchment paper if you prefer easy removal of the bars later on. This also helps prevent sticking, which can affect the final texture.
Step 7. Transfer the mixture into the prepared baking dish, pressing it down firmly with a spatula or your hands to create an even layer. This step is crucial for ensuring that the bars hold their shape after baking.
Step 8. Bake in the preheated oven for 20-25 minutes. You’ll want to look for a golden brown color on top, indicating they have set properly. The edges may become slightly crisp while the center remains soft, which is desirable for a chewy texture.
Step 9. Once baked, allow the bars to cool in the pan for about 10-15 minutes. This helps them firm up a bit before cutting. Keep an eye on the cooling process, as they will be easier to handle once they are slightly set but still warm.
Step 10. After cooling, use a sharp knife to cut the bars into your desired size. A clean cut will help prevent crumbling, ensuring you get neat, presentable bars. Store them appropriately to maintain freshness.

Serving Suggestions
These granola bars shine as a quick breakfast option, providing a balance of fiber and protein to start your day. They can also be enjoyed as a mid-morning or afternoon snack to keep energy levels stable. Wrapped individually or stored in a container, they make for an easy grab-and-go option for family meals or packed lunches. Should you have any leftovers, they easily hold up throughout the week, maintaining their flavor and texture.
Pro Tips for Best Results
- Ensure thorough mixing so each bar has a consistent flavor and texture. Uneven mixing can lead to some sections being too dry or too wet.
- Press the mixture firmly into the pan to help the bars hold together after baking, preventing crumbling.
- Allow the bars to cool completely before cutting; this will help them firm up for easier handling.
- Store in an airtight container to keep them fresh longer.
- Experiment with different dried fruits or nuts based on preference without changing the overall recipe structure.
Common Mistakes to Avoid
- Not Mixing Thoroughly: If the ingredients aren’t combined well, some bars may end up dry or lacking flavor. Make sure everything is evenly distributed, as harmony in texture and taste is key.
- Using Too Much Liquid: If you add excess honey or nut butter, the bars may become overly sticky, affecting their ability to hold together. Stick to the specified measurements to maintain the right consistency.
- Skipping the Cooling Time: Cutting the bars while they are still warm can lead to crumbling and messy pieces. Always let them cool for a bit to set properly before slicing.
- Not Using Parchment Paper: Baking directly in the pan without parchment can make it tough to remove the bars later. Lining the pan ensures easy removal and clean edges.
- Overbaking: If you bake the bars for too long, they may turn hard and lose their chewy texture. Keep a close eye on them and remove them once they are golden.
- Cutting Bars Too Soon: Cutting into the bars too quickly may cause them to fall apart. Giving them time to set after cooling is essential for maintaining their structure.
Variations & Substitutions
For added variety, you might consider changing up the nuts or seeds to suit your taste or dietary preferences. You can also adjust the types of dried fruit depending on what you have at home. Another option is to swap in different nut butters, which can give a unique flavor twist. These changes can enhance the recipe while still keeping the overall structure intact.
Storage & Reheating
Store your granola bars in an airtight container at room temperature for optimal freshness. They can last up to a week this way. If you want to keep them longer, it’s best to refrigerate them, where they can last up to a couple of weeks. For freezing, wrap them tightly and place them in a freezer-safe bag; they will maintain their quality for several months. When you’re ready to enjoy a bar, let it sit at room temperature for a few minutes to soften slightly.
Frequently Asked Questions
Can I make this recipe ahead of time?
Absolutely! These granola bars are perfect for making ahead of time. They can be stored in an airtight container, allowing for easy grab-and-go snacks throughout the week.
How long does it last in the fridge?
When stored properly in an airtight container, these granola bars can last about two weeks in the refrigerator. They’ll maintain their flavor and texture if sealed up nicely.
Can I freeze this recipe?
Yes, you can freeze these granola bars for longer storage. Wrap them individually in plastic wrap or foil, then place them in a freezer-safe bag. They can keep their quality for months.
What can I substitute for one ingredient?
If you want to replace the honey, maple syrup works great as a 1:1 substitute. Likewise, you can use different nut butters if you prefer a different flavor or have dietary restrictions.
Why didn’t my recipe turn out as expected?
If the bars fell apart, they may not have been mixed or pressed together firmly enough. Ensuring proper mixing and pressing into the baking dish will aid in keeping the bars intact.
Final Thoughts
Making these healthy sourdough granola bars is a simple yet rewarding experience. They offer a satisfying blend of textures and flavors while being practical for any meal or snack occasion. With their ease of preparation and flexibility in ingredients, they can truly become a staple in your kitchen. Enjoy the process of making and sharing these delightful bars, knowing they’ll nourish you and those you care about.

Healthy Sourdough Granola Bars
Ingredients
Base Ingredients
- 1 cup sourdough starter discard or active, contributes moisture and flavor
- 2 cups rolled oats provides structure and chew
Add-ins
- 1/2 cup nuts or seeds, chopped such as almonds, walnuts, sunflower seeds, etc.; adds crunch and healthy fats
- 1/4 cup honey or maple syrup natural sweetness and binding
- 1/4 cup nut butter such as almond butter, peanut butter, etc.; adds creaminess and helps hold bars together
- 1/4 cup dried fruit such as raisins, cranberries, chopped apricots, etc.; provides chewiness and natural sweetness
- 1/4 cup chocolate chips or chunks optional, for sweetness and richness
- 1/2 teaspoon vanilla extract adds depth of flavor
- pinch salt enhances overall flavor
Instructions
Preparation
- In a large mixing bowl, combine the sourdough starter with the rolled oats.
- Add the chopped nuts or seeds to the oat mixture and mix well.
- Incorporate the honey or maple syrup and nut butter, stirring until everything is well-combined.
- Add the dried fruit and mix gently to ensure it's evenly scattered.
- If using, fold in the chocolate chips or chunks.
- Preheat your oven to 350°F. Line your baking dish with parchment paper.
- Transfer the mixture to the prepared baking dish and press down firmly.
Baking
- Bake in the preheated oven for 20-25 minutes or until golden brown.
- Once baked, let the bars cool in the pan for about 10-15 minutes before cutting.
Serving
- Cut the bars into your desired size with a sharp knife.
- Store appropriately to maintain freshness.


