
Finding simple, satisfying snacks to enjoy any time of day can be a delight. Homemade Peanut Butter Granola Bars fit the bill perfectly, serving as a reliable treat for busy weeknights, leisurely weekends, or gatherings. They’re also great for those quiet moments when you crave something familiar. With their wholesome ingredients and pleasing texture, these bars are not only easy to make but also customizable to suit your taste. Let’s dive into this comforting recipe that welcomes you into the kitchen.
Why You’ll Love This 5 Ingredient Granola Bars
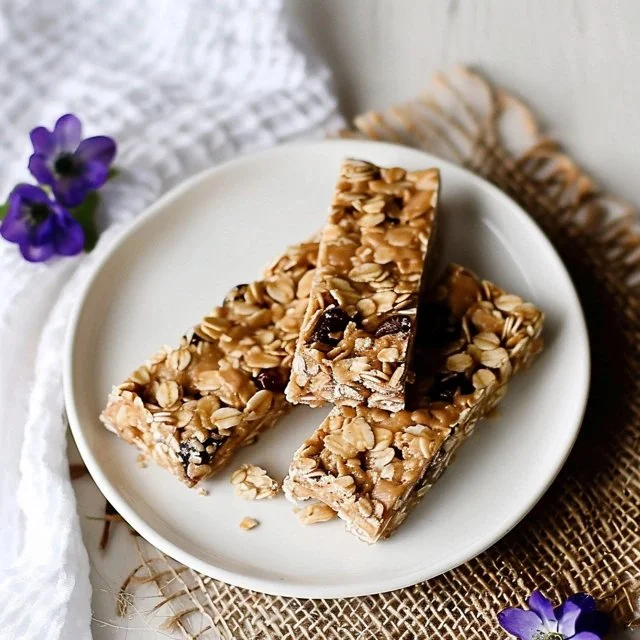
These Homemade Peanut Butter Granola Bars are both easy to make and dependable for snacking. Their balanced flavor combines the nuttiness of peanut butter with the sweetness of honey or maple syrup, creating a comforting treat. With practical everyday value, these bars fit perfectly into busy lifestyles while satisfying cravings. You’ll appreciate their straightforward preparation and the ability to make adjustments with optional ingredients.
Kitchen Tools You’ll Need
- Mixing bowl
- Baking dish
- Spatula or wooden spoon
- Parchment paper (optional)
Ingredients
- 3 cups old-fashioned rolled oats (provide a chewy texture)
- 3/4 cup natural peanut butter (adds moisture and nutty flavor)
- 1/3 cup honey or maple syrup (sweetens and binds ingredients)
- 1/2 cup mini chocolate chips (optional, for sweetness)
- 2 whole eggs (act as a binder)
- Pinch of salt (optional, enhances flavor)
- Walnuts, pecans, almonds, chia, sunflower, or pumpkin seeds (optional, for crunch)
- Dried fruit (optional, adds chewiness and sweetness)

How to Make Homemade Peanut Butter Granola Bars
Step 1. Start by preheating your oven to a moderate temperature. This preheating step is essential for ensuring even baking. Prepare your baking dish by lightly greasing it or lining it with parchment paper to prevent sticking.
Step 2. In a large mixing bowl, combine the rolled oats, natural peanut butter, and honey or maple syrup. Use a spatula or wooden spoon to mix these ingredients together thoroughly until they are well incorporated. You’ll want to see a cohesive mixture that sticks together slightly.
Step 3. Add the two whole eggs to the oat mixture, mixing until everything is combined evenly. The eggs help bind the ingredients together, giving the bars structure. Ensure there are no visible streaks of egg in the mixture.
Step 4. If using, fold in mini chocolate chips and any optional ingredients like nuts or dried fruit at this stage. These add-ins introduce texture and flavor, making each bite delightful. Stir gently until they are evenly distributed throughout the mixture.
Step 5. Pour the granola mixture into the prepared baking dish, spreading it out evenly. It’s best to press it down firmly with your fingers or a spatula to ensure it holds together well while baking. An even surface will lead to uniform cooking.
Step 6. Once the mixture is spread out, place the dish in the preheated oven. Bake until the bars are set and lightly golden on the edges, which signifies they are done. Keep an eye out for that golden color, as this ensures the bars will have a nice texture.
Step 7. After baking, remove the dish from the oven and let it cool completely in the pan. This cooling period allows the bars to firm up and makes cutting easier. You can speed up the process by placing it in the refrigerator.
Step 8. Once cooled, cut the granola bars into squares or rectangles as desired. The bars should hold their shape well but still be slightly chewy. Store any leftovers in an airtight container to maintain freshness.

Serving Suggestions
These granola bars are incredibly versatile and can be enjoyed in numerous ways. They make for a convenient breakfast option when paired with a piece of fruit or a yogurt. You can also pack them as snacks for those busy days at work or school. Enjoy them during family meals as a fun dessert or grab one for a quick pick-me-up. Any leftover bars can be stored easily and are perfect for enjoying throughout the week.
Pro Tips for Best Results
- Press the mixture firmly into the baking dish to help the bars hold together better.
- Experiment with your favorite nuts and seeds to add texture and flavor to the bars.
- Allow the bars to cool completely before cutting to avoid crumbling.
- Use natural nut butter for a smoother texture and better flavor.
- Store the bars in an airtight container to retain their freshness longer.
- If using dried fruit, chop it into smaller pieces for even distribution.
Common Mistakes to Avoid
- Not pressing the mixture firmly enough: This can lead to crumbly bars that don’t hold together. Make sure to press the mixture into the baking dish until compact.
- Overbaking the bars: Baking too long can make them dry and hard. Keep an eye on the edges for a light golden color, indicating they are ready.
- Skipping the cooling process: Cutting the bars while they are warm can result in uneven pieces. Allowing them to cool fully helps them set properly.
- Using sweetened peanut butter: Sweetened varieties might overpower the flavors and disturb the balance. Stick to natural peanut butter to maintain a balanced taste.
- Not measuring ingredients precisely: Accurate measurements ensure the correct texture and binding. Use measuring cups for precision to achieve the desired outcome.
- Forgetting the optional ingredients: Leaving out nuts or dried fruits may lead to a more uniform texture. Including these can elevate the flavor and crunchiness.
Variations & Substitutions
Consider trying different nut butters like almond or cashew for a change. For a fruitier bar, include dried fruits like cranberries or apricots, providing natural sweetness. You can also vary the types of nuts and seeds to suit your taste preferences. Adjust the sweetener based on how sweet you’d like your bars to be—less if you prefer a more neutral flavor.
Storage & Reheating
The granola bars can be stored at room temperature in an airtight container for several days. For longer storage, keep them in the refrigerator, where they can last for up to two weeks. You can also freeze the bars if you want to store them for an extended period—just make sure to wrap them tightly. When ready to enjoy, thaw at room temperature or briefly heat in the microwave to regain that freshly-baked texture.
Frequently Asked Questions
Can I make this recipe ahead of time?
Yes, you can prepare these granola bars ahead of time. They store well, making them ideal for quick snacks throughout the week. Just be sure to allow them to cool completely before cutting and storing.
How long does it last in the fridge?
Stored in an airtight container in the fridge, these granola bars can last for about two weeks. This helps maintain their freshness and prevent them from becoming stale.
Can I freeze this recipe?
Absolutely! You can freeze the granola bars for up to three months. Just wrap them tightly to avoid freezer burn and thaw at room temperature whenever you’re ready to eat them.
What can I substitute for one ingredient?
If you need to substitute, consider using almond butter instead of peanut butter. Other nuts or seeds can also replace those mentioned as optional, depending on what you have on hand.
Why didn’t my recipe turn out as expected?
There can be a few reasons for unexpected results, such as not pressing the mixture firmly or overbaking the bars. Make sure to follow the steps carefully, especially regarding measurements and baking times.
Final Thoughts
Making Homemade Peanut Butter Granola Bars is a straightforward process that results in a satisfying snack. These bars offer a balance of protein, healthy fats, and a touch of sweetness, making them a delightful choice for any time of the day. With the option to customize and the ease of preparation, they can become a comforting staple in your kitchen. Enjoy the simple pleasure of creating something wholesome and delicious at home.

Homemade Peanut Butter Granola Bars
Ingredients
Base Ingredients
- 3 cups old-fashioned rolled oats Provides a chewy texture
- 3/4 cup natural peanut butter Adds moisture and nutty flavor
- 1/3 cup honey or maple syrup Sweetens and binds ingredients
- 2 whole eggs Helps as a binder
- pinch salt Enhances flavor
Optional Ingredients
- 1/2 cup mini chocolate chips Optional, for sweetness
- walnuts, pecans, almonds, chia, sunflower, or pumpkin seeds Optional, for crunch
- dried fruit Optional, adds chewiness and sweetness
Instructions
Preparation
- Preheat your oven to a moderate temperature and prepare your baking dish by lightly greasing it or lining it with parchment paper.
- In a large mixing bowl, combine the rolled oats, natural peanut butter, and honey or maple syrup, mixing until well incorporated.
- Add the whole eggs and mix until everything is combined evenly.
- Fold in mini chocolate chips and any optional ingredients like nuts or dried fruit.
- Pour the granola mixture into the prepared baking dish, spreading it out evenly and pressing it down firmly.
Baking
- Place the dish in the preheated oven and bake until the bars are set and lightly golden on the edges.
- After baking, remove from the oven and let it cool completely in the pan.
- Once cooled, cut the granola bars into squares or rectangles.


