
Creating a wholesome snack at home can be incredibly satisfying, especially when you can prepare it in just 30 minutes. This recipe for homemade granola bars brings together simple ingredients and flavors that anyone can appreciate. They’re perfect for a busy weeknight, a laid-back weekend, or a gathering with friends. You can also relish these bars during quiet moments, making them an easy addition to your routine. The comforting blend of textures and flavors makes these granola bars a family-friendly treat you’ll return to again and again. Let’s dive into making this delightful snack.
Why You’ll Love This Recipe homemade granola bars in 30 minutes
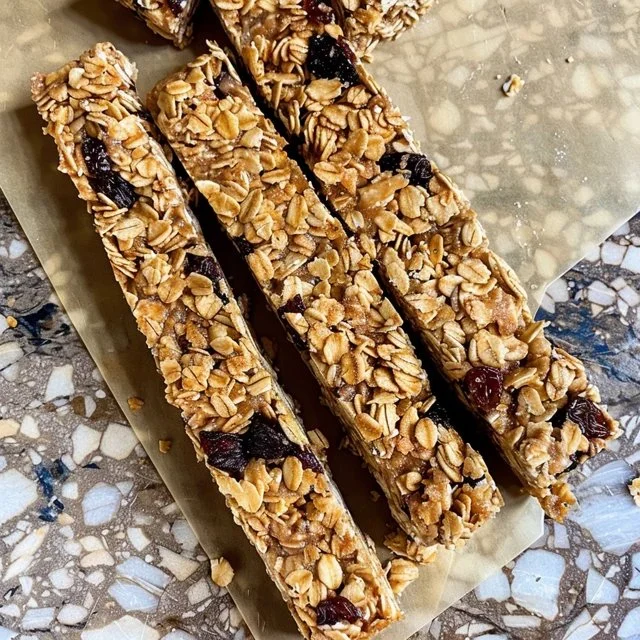
These homemade granola bars are not only easy to make but also provide a reliable snack option everyone will enjoy. Their balanced flavors come from the mix of oats, honey, and add-ins like chocolate chips or nuts, making them comforting yet invigorating. You can customize the add-ins to suit your taste, giving practical everyday value. With homemade granola bars in 30 minutes, you’ll have a delicious snack ready when you need it.
Kitchen Tools You’ll Need
- Mixing bowl
- Spoon or spatula
- Baking dish
- Parchment paper (optional)
Ingredients
- 3/4 cup butter (adds richness and moisture)
- 1 cup honey (provides sweetness and binds ingredients)
- 1 teaspoon vanilla (adds warmth and depth of flavor)
- 4½ cups rolled oats (gives structure and chewiness)
- 1 cup whole wheat flour or spelt flour (provides a nutty flavor and binding)
- 1/4 cup flax seed meal (optional) (adds fiber and a nutty taste)
- 1 teaspoon baking soda (helps with leavening)
- 1 cup total add-ins (chocolate chips, sunflower seeds, dried cranberries, chopped almonds, raisins, chopped peanuts) (offers flavor and texture diversity)

How to Make homemade granola bars in 30 minutes
Step 1. Begin by preheating your oven to a moderate temperature. This step is important as it ensures that your granola bars cook evenly. While the oven is heating, you can prepare your baking dish by lining it with parchment paper for easy removal later.
Step 2. In a mixing bowl, combine 3/4 cup of butter and 1 cup of honey. Use a spoon or spatula to mix them together until they are well-blended. The butter should soften from the heat of the honey, creating a smooth, cohesive mixture.
Step 3. Next, add 1 teaspoon of vanilla to the butter and honey mixture. Stir it in until evenly distributed. The vanilla will enhance the sweetness and overall flavor profile of your granola bars.
Step 4. In another bowl, mix together the 4½ cups of rolled oats, 1 cup of whole wheat flour or spelt flour, 1/4 cup of flax seed meal (if using), and 1 teaspoon of baking soda. This combination helps create a well-rounded texture and will form the foundation of your bars.
Step 5. Gradually add the dry mixture into the wet ingredients. Stir well until everything is fully incorporated. The mixture should have a sticky consistency that holds together nicely; this indicates it’s ready for the add-ins.
Step 6. Fold in your selection of add-ins, making sure to distribute them evenly throughout the mixture. This step allows you to customize the flavors while ensuring that each bar has a variety of textures and tastes.
Step 7. Transfer the mixture into your prepared baking dish. Press it down firmly and evenly to ensure a compact base that will hold together once baked. It’s important that the mixture is tightly packed to create solid bars rather than loose granola.
Step 8. Bake your mixture in the preheated oven until the edges start to turn golden brown. This visual cue indicates that the bars are nearly done and will set properly as they cool.
Step 9. Remove the baking dish from the oven and allow it to cool completely in the dish. This cooling process is essential as it helps firm up the bars and makes them easier to cut into portions.
Step 10. Once cooled, carefully lift the granola out of the dish using the parchment paper. Cut it into your desired sizes, and your homemade granola bars are ready to enjoy.

Serving Suggestions
These granola bars are versatile and can be enjoyed in various ways. They make a convenient breakfast option when paired with yogurt and fresh fruit. As a snack, they provide a satisfying crunch and a boost of energy during the day. These bars are also great for family meals or packed lunches, ensuring everyone has a tasty and wholesome treat. If you have leftovers, they store well for future snacking.
Pro Tips for Best Results
- Ensure your butter is softened for easier mixing with the honey.
- Press the mixture firmly into the baking dish to prevent crumbly bars.
- Experiment with different add-ins to suit your taste preference.
- Allow bars to cool completely before cutting for cleaner edges.
- Store in an airtight container to maintain freshness.
Common Mistakes to Avoid
- Not preheating the oven – Skipping this step can result in uneven baking, leading to undercooked or overcooked bars. Always preheat to the specified temperature for the best results.
- Using too much flour – This can cause the bars to become dry and crumbly. Measure carefully to achieve the right balance and texture.
- Not pressing the mixture firmly – If you don’t pack the mixture tightly in the baking dish, the bars can fall apart. Use your hands or a flat object to press it down firmly.
- Opening the oven door too soon – Doing this can affect the oven’s temperature, leading to uneven baking. Try to resist checking too frequently until the baking time is nearly up.
- Cutting the bars while warm – This can result in messy, uneven pieces. Allow the bars to cool completely in the dish for clean cuts.
- Ignoring add-in ratios – Using too many add-ins can alter the texture and bindability of the bars. Stick to the recommended amount for best results.
Variations & Substitutions
You can mix and match your add-ins depending on what you have on hand. Consider using different nuts, seeds, or dried fruits to create new flavor profiles. For those who prefer a sweeter bar, a dash of cinnamon or a touch of cocoa powder can be mixed into the dry ingredients for additional flavor. Feel free to adjust the quantity of honey based on your taste preference as well.
Storage & Reheating
Store your homemade granola bars at room temperature in an airtight container for up to one week. For longer storage, keep them in the refrigerator, where they can last for up to two weeks. You can also freeze them for up to three months. For best results, thaw at room temperature, or if you prefer, enjoy them frozen for a crunchy snack.
Frequently Asked Questions
Can I make this recipe ahead of time?
Absolutely! You can prepare these granola bars ahead and store them in an airtight container. They make for an excellent grab-and-go snack or breakfast option during busy weeks.
How long does it last in the fridge?
When stored properly in the refrigerator, these granola bars can last up to two weeks. Just be sure to keep them in an airtight container to maintain their freshness.
Can I freeze this recipe?
Yes, you can freeze the granola bars! Once cooled and cut, wrap them individually in plastic wrap and place them in a freezer bag. They can be kept in the freezer for about three months.
What can I substitute for one ingredient?
If you don’t have whole wheat flour, you can swap it for spelt flour. Both provide a nice texture, although spelt flour has a slightly nuttier flavor.
Why didn’t my recipe turn out as expected?
Common issues could arise from not pressing the mixture firmly, using too much flour, or cutting the bars before they fully cool. Following the steps carefully can help ensure the best outcome.
Final Thoughts
Making homemade granola bars is a simple and enjoyable process that yields a comforting and healthy treat. These bars are perfect for a variety of occasions, from breakfast to snacks after school or work. Enjoy the satisfaction of creating something delicious and nourishing that the whole family will love. With this recipe, you can have a reliable go-to option for any time of the day. Happy cooking!

Homemade Granola Bars
Ingredients
Base Ingredients
- 3/4 cup butter adds richness and moisture
- 1 cup honey provides sweetness and binds ingredients
- 1 teaspoon vanilla adds warmth and depth of flavor
- 4 1/2 cups rolled oats gives structure and chewiness
- 1 cup whole wheat flour or spelt flour provides a nutty flavor and binding
- 1/4 cup flax seed meal optional; adds fiber and a nutty taste
- 1 teaspoon baking soda helps with leavening
Add-Ins
- 1 cup mixed add-ins (chocolate chips, sunflower seeds, dried cranberries, chopped almonds, raisins, chopped peanuts) offers flavor and texture diversity
Instructions
Preparation
- Preheat your oven to a moderate temperature.
- Prepare your baking dish by lining it with parchment paper.
Mix Wet Ingredients
- In a mixing bowl, combine butter and honey, mixing until well-blended.
- Add vanilla and stir until evenly distributed.
Combine Dry Ingredients
- In another bowl, mix rolled oats, whole wheat flour or spelt flour, flax seed meal (if using), and baking soda.
Combine Wet and Dry Ingredients
- Gradually add the dry mixture to the wet ingredients and stir until fully incorporated.
Add the Mix-ins
- Fold in the selection of add-ins evenly throughout the mixture.
Bake
- Transfer the mixture into the baking dish and press down firmly to create a compact base.
- Bake until the edges start to turn golden brown.
Cool and Cut
- Remove from oven and allow to cool completely in the dish.
- Once cooled, lift the granola out of the dish using the parchment paper and cut into bars.


