
There’s something comforting about preparing a simple recipe that fills your home with warmth. These Maple Pecan Granola Bars are perfect for any time of day, whether it’s a quick breakfast, an afternoon snack, or a little something to enjoy at a family gathering. With their chewy texture and nutty flavor, they hold a special place during slow mornings or busy weeknights. They offer practicality and make a delightful companion for quiet moments or social gatherings. Let’s dive into the recipe.
Why You’ll Love This Maple Pecan Granola Bars
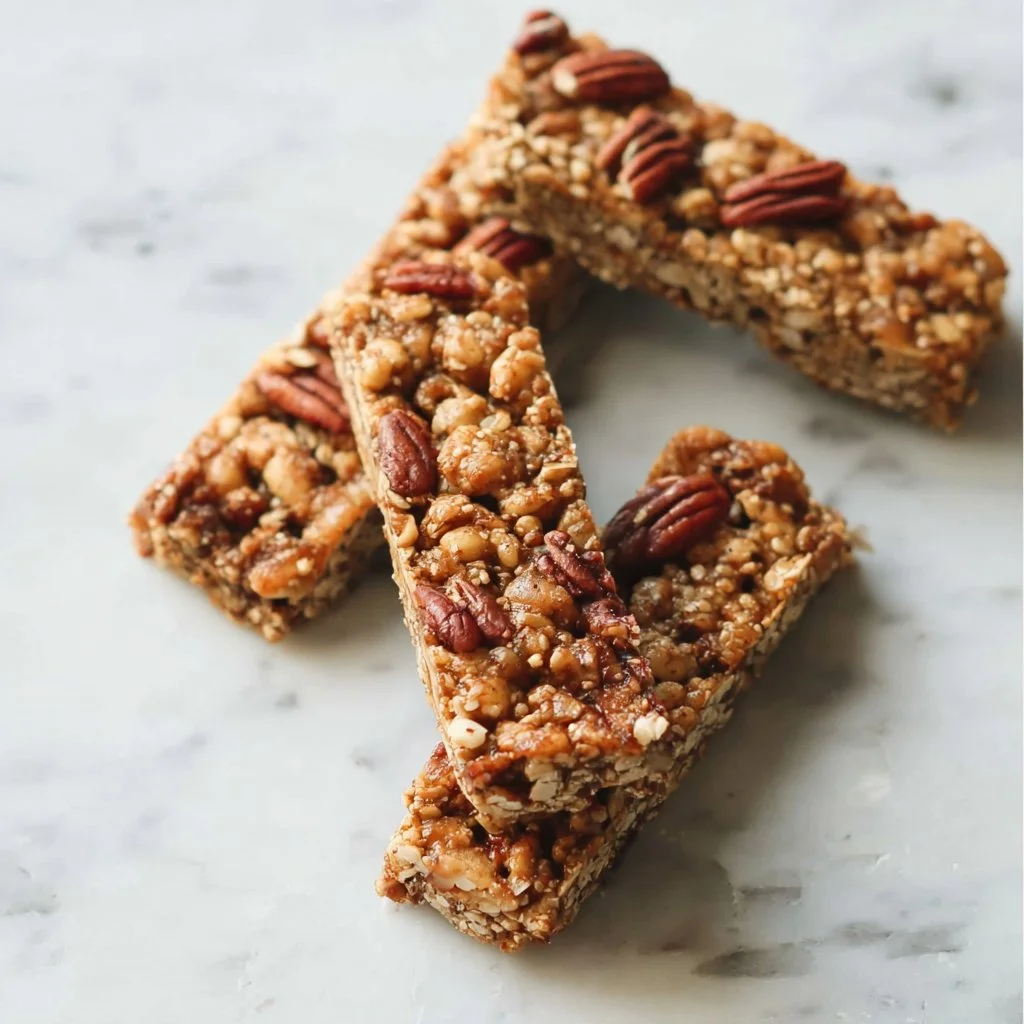
The ease of making these Maple Pecan Granola Bars will quickly become a reliable addition to your routine. Their balanced flavor of sweet maple syrup and the crunch of pecans provides comfort without being overly indulgent. With everyday ingredients and simple steps, this recipe brings practical value to your kitchen, making it a go-to choice for snacks or light meals.
Kitchen Tools You’ll Need
- Mixing bowl
- Baking dish
- Spoon or spatula
- Measuring cups and spoons
- Parchment paper
Ingredients
- 1 cup oats (certified gluten-free) (adds chewiness)
- 1/2 cup oat flour (certified gluten-free) (provides structure)
- 1/4 cup flax seed, ground (adds moisture)
- 3/4 cup pecans, finely chopped (offers crunch)
- 2 1/2 tsp cinnamon (enhances warmth and flavor)
- 1/4 tsp salt (balances sweetness)
- 1/2 cup maple syrup (sweetens and binds)
- 1/4 cup coconut oil, melted (adds richness)
- 1 tsp vanilla (adds depth of flavor)
- 1 egg (binds ingredients together)

How to Make Maple Pecan Granola Bars
Step 1. Start by gathering all your ingredients and placing them in a spacious mixing bowl. This helps you ensure that you have everything ready and allows for an easier mixing process later.
Step 2. In the bowl, combine the oats, oat flour, ground flax seed, chopped pecans, cinnamon, and salt. Mix these dry ingredients thoroughly to distribute the seasonings evenly and create a solid base for your granola bars.
Step 3. In a separate bowl, whisk together the maple syrup, melted coconut oil, vanilla, and egg. This step incorporates the wet ingredients, ensuring that they blend well for a cohesive mixture.
Step 4. Gradually pour the wet mixture into the dry ingredients. Stir gently with a spoon or spatula until everything is well combined. You’ll want to ensure that the oats and nuts are evenly coated with the syrupy mix.
Step 5. Line a baking dish with parchment paper for easy removal once the bars are set. Pour the mixture into the dish, spreading it out evenly. Press it down firmly with your hands or a spatula for a compact texture, which will help the bars hold together.
Step 6. Allow the granola bars to cool completely within the dish after removing them from the oven. Cutting them while warm can lead to messy portions, so give them time to set before slicing.

Serving Suggestions
These Maple Pecan Granola Bars are versatile and can be enjoyed in various ways. They make a wonderful breakfast option when paired alongside yogurt or fresh fruit. As snacks, they hold up well for mid-afternoon cravings and pair nicely with a hot cup of tea or coffee. They are also great for family meals on the go, making them perfect for road trips or packed lunches. Plus, any leftovers can be stored for snacking later in the week, adding to their practicality.
Pro Tips for Best Results
- Make sure to press the mixture firmly into the baking dish to ensure they hold together well.
- Allow the bars to cool completely before cutting to prevent crumbling.
- Store the bars in an airtight container to maintain their moisture.
- If your mixture feels too dry, a small splash of maple syrup or water can help adjust it.
- Feel free to customize the nuts if you have other favorites on hand.
Common Mistakes to Avoid
- Not pressing the mixture firmly: This can cause the bars to crumble and fall apart. Pressing firmly ensures they hold shape once cooled.
- Cutting before cooling: Slicing the bars while warm can lead to uneven pieces. Always let them cool completely for clean cuts.
- Overbaking the bars: If they bake too long, they can become hard and dry. Keep an eye on the texture towards the end of the baking process.
- Using unground flax seeds: Ground flax seeds are essential for proper absorption and moisture; whole seeds may not meld properly into the mixture.
- Skipping the parchment paper: This can create a sticky mess and make it challenging to remove the bars from the dish. Use parchment for easy lifting and serving.
- Not measuring ingredients properly: Over or under-measuring can lead to imbalanced flavors and textures. Use measuring cups and spoons for accuracy.
Variations & Substitutions
While this recipe stands well on its own, consider incorporating different nuts, such as walnuts or almonds, for varied flavor. You could also switch up the spices, adding a touch of nutmeg or cardamom for a unique twist. For those wanting a fruity version, dried cranberries or raisins can provide a nice chew and sweetness. Feel free to explore and find your favorite combinations within the framework of the recipe.
Storage & Reheating
These Maple Pecan Granola Bars can be stored at room temperature in an airtight container for up to a week. For longer storage, consider placing them in the refrigerator, where they will last for about two weeks. If you want to keep them even longer, they freeze well. Wrap individual bars in plastic wrap or place them in a freezer-safe container for up to three months. For best texture, thaw at room temperature before enjoying.
Frequently Asked Questions
Can I make this recipe ahead of time?
Yes, you can prepare this recipe ahead of time. It’s a great option for meal prep, and the bars can be stored for several days or even longer if frozen.
How long does it last in the fridge?
When stored properly in the refrigerator, these granola bars can last up to two weeks. Be sure to keep them in an airtight container to maintain freshness.
Can I freeze this recipe?
Yes, freezing is a great option. Wrap individual bars and place them in a freezer-safe container to keep them fresh for up to three months.
What can I substitute for one ingredient?
You can substitute the pecans with walnuts or almonds if you prefer a different nut flavor. You can also replace the egg with a flax egg for a vegan option.
Why didn’t my recipe turn out as expected?
If the bars fall apart, they may not have been pressed down firmly enough or could have been cut too soon. Ensure even pressure when packing and allow for cooling before cutting.
Final Thoughts
Making these Maple Pecan Granola Bars is a straightforward task that results in rewarding snacks for any occasion. The combination of flavors is delightful, and they offer a satisfying texture that’s hard to resist. Enjoying them as part of your routine is a gentle reminder that simple ingredients can create something special in the kitchen. The effort involved is small, and the result is sure to bring comfort to your day.

Maple Pecan Granola Bars
Ingredients
Dry Ingredients
- 1 cup oats (certified gluten-free) adds chewiness
- 1/2 cup oat flour (certified gluten-free) provides structure
- 1/4 cup flax seed, ground adds moisture
- 3/4 cup pecans, finely chopped offers crunch
- 2 1/2 tsp cinnamon enhances warmth and flavor
- 1/4 tsp salt balances sweetness
Wet Ingredients
- 1/2 cup maple syrup sweetens and binds
- 1/4 cup coconut oil, melted adds richness
- 1 tsp vanilla adds depth of flavor
- 1 piece egg binds ingredients together
Instructions
Preparation
- Start by gathering all your ingredients and placing them in a spacious mixing bowl.
- In the bowl, combine the oats, oat flour, ground flax seed, chopped pecans, cinnamon, and salt. Mix these dry ingredients thoroughly.
- In a separate bowl, whisk together the maple syrup, melted coconut oil, vanilla, and egg.
- Gradually pour the wet mixture into the dry ingredients, stirring gently until everything is well combined.
- Line a baking dish with parchment paper. Pour the mixture into the dish and press it down firmly for a compact texture.
Baking
- Bake in the oven at 350°F (175°C) for about 25 minutes or until golden brown.
- Allow the granola bars to cool completely in the dish before slicing.


