
There’s something comforting about creating a simple, satisfying snack at home. With these chewy homemade granola bars, you’ll have a treat that works well for busy weeknights, laid-back weekends, family gatherings, or even quiet moments spent with a book. This recipe captures the essence of wholesome ingredients while delivering a delightful texture that’s both chewy and crunchy. It’s a practical way to enjoy a nourishing snack without the fuss, inviting you into the kitchen for some enjoyable cooking.
Why You’ll Love This Chewy Homemade Granola Bars
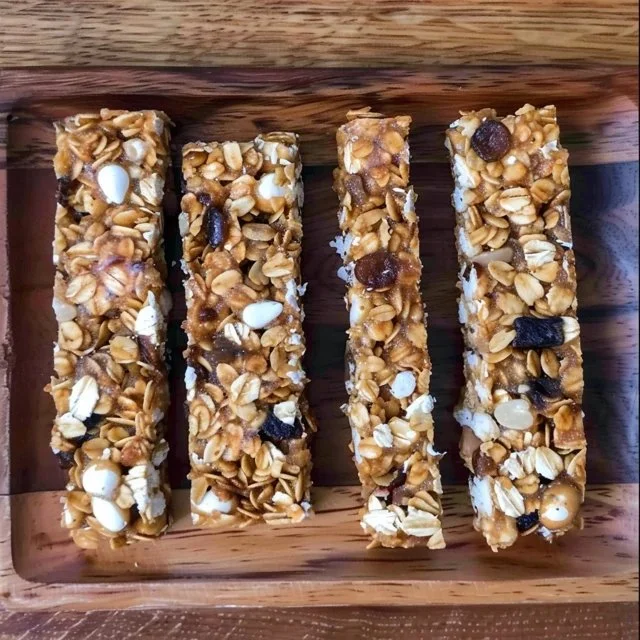
These chewy homemade granola bars are easy to make and reliable in their flavor and texture. The balance of sweetness from the honey and brown sugar, combined with the chewiness of oats and marshmallows, makes them a comforting experience. Whether you’re grabbing a quick breakfast or needing a snack to satisfy your hunger, this recipe offers practical value for everyday living.
Kitchen Tools You’ll Need
- Mixing bowl
- Saucepan
- Spoon or spatula
- Baking dish
- Parchment paper
Ingredients
- 6 tablespoons unsalted butter (provides richness and moisture)
- 6 tablespoons brown sugar, packed (adds sweetness and a hint of caramel flavor)
- 2/3 cup honey (contributes sweetness and helps bind ingredients)
- 3 cups rolled oats (provides bulk and chewy texture)
- 1 1/2 cups Rice Krispies cereal (adds crunch and lightness)
- 1/2 cup graham crackers, crushed in pieces and crumbs (gives a slight sweetness and texture)
- 1/2 teaspoon salt (enhances overall flavor)
- 1/2 cup mini chocolate chips (adds sweetness and richness)
- 1/2 cup cereal marshmallows (introduces chewiness and a hint of sweetness)

How to Make Chewy Homemade Granola Bars
Step 1. Begin by melting the unsalted butter in a saucepan over low heat. It’s important to keep the heat gentle to prevent burning the butter, which can happen if it’s cooked too quickly. Stir it occasionally with a spoon until it’s fully melted and smooth.
Step 2. Once the butter is melted, add the packed brown sugar and continue to stir. The mixture should become creamy and slightly thicker. Keep an eye on it to ensure it doesn’t boil; you want a smooth consistency that combines evenly with the butter.
Step 3. Pour in the honey, mixing it well with the butter and sugar. This will add a lovely sweetness and help ensure that all the dry ingredients stick together later. Stir until everything is well combined, and remove the saucepan from heat.
Step 4. In a large mixing bowl, combine the rolled oats, Rice Krispies cereal, crushed graham crackers, and salt. Gently mix the dry ingredients until they are well distributed. This step helps to ensure that all the flavors are balanced throughout the granola bars.
Step 5. Gradually pour the melted mixture from the saucepan into the bowl with the dry ingredients. Use a spatula or spoon to carefully fold everything together until all the dry ingredients are fully coated with the buttery mixture. This is key for achieving that chewy texture.
Step 6. After the mixture is well combined, fold in the mini chocolate chips and cereal marshmallows. These will add delightful pockets of sweetness and chewy goodness to the final bars. Make sure to mix gently to avoid breaking the marshmallows.
Step 7. Line a baking dish with parchment paper for easy removal later. Then, transfer the granola mixture into the dish, spreading it out evenly. Press down firmly to compact the mixture, creating a uniform layer. This will help the bars hold together when cut.
Step 8. Set the baking dish aside to cool at room temperature for at least an hour. As the mixture cools, it will firm up, which is essential for achieving that perfect granola bar texture when you cut into it.
Step 9. Once fully cooled, lift the granola mixture out of the baking dish using the parchment paper. Cut it into bars or squares based on your preference. A sharp knife works best for clean cuts, ensuring nice edges that are easy to enjoy.

Serving Suggestions
These chewy homemade granola bars shine in multiple situations. They make for a nutritious breakfast option when you’re on the go or a satisfying snack between meals. They’re also great to have on hand for family gatherings, providing a sweet treat that everyone can enjoy without fuss. Any leftovers can be stored conveniently for future snacking, making these bars a practical addition to your kitchen.
Pro Tips for Best Results
- Measure the ingredients accurately for consistent results.
- Press the mixture firmly into the pan to help the bars hold together.
- Allow the bars to cool completely before cutting for cleaner edges.
- Store in an airtight container to maintain freshness.
- For added texture, consider varying the types of crushed graham crackers or even adding seeds.
Common Mistakes to Avoid
- Not cooling long enough: Failing to let the bars cool fully can result in crumbly granola rather than chewy bars. Allow adequate time for cooling before cutting.
- Overheating the butter mixture: Cooking the butter too quickly can lead to burning. Always melt on low and stir gently to keep it smooth.
- Not pressing mixture firmly: If the mixture isn’t pressed down well in the dish, it can fall apart easily. Make sure to compact it firmly for cohesive bars.
- Skipping the salt: Omitting the salt can lead to bland bars. Salt enhances the flavors, making each bite more enjoyable.
- Rushing the cutting process: Cutting while the mixture is still warm can result in messy edges. Wait until completely cooled for clean cuts.
- Not adding enough mix-ins: Skimping on chocolate chips or marshmallows will yield a less flavorful result. Be generous for a better balance of flavors.
Variations & Substitutions
Feel free to adjust the mix-ins to suit your taste. For a fruity twist, consider adding dried fruits like cranberries or raisins. If you prefer a nuttier flavor, try including chopped nuts or seeds to enhance the texture and nutrition. Just ensure any added ingredients don’t alter the overall moisture balance in the recipe.
Storage & Reheating
Store the granola bars at room temperature in an airtight container for up to a week. For longer storage, you can keep them in the fridge, where they’ll last about two weeks. If you want to freeze them, wrap individual bars tightly in plastic wrap or aluminum foil and place them in a freezer-safe bag. They can be easily reheated in the microwave for a few seconds, but it’s best to enjoy them at room temperature for optimal texture.
Frequently Asked Questions
Can I make this recipe ahead of time?
Absolutely! These granola bars store well, making them perfect for preparing in advance. Once they’ve cooled down, simply store them in an airtight container for easy access throughout the week.
How long does it last in the fridge?
When stored properly in an airtight container, these granola bars can last about two weeks in the fridge. They remain chewy and delicious, making them a reliable snack option.
Can I freeze this recipe?
Yes, these granola bars freeze well! Wrap them individually in plastic wrap or foil and store them in a freezer-safe bag. They can be enjoyed straight from the freezer or thawed in the fridge.
What can I substitute for one ingredient?
If you’re out of honey, you can use maple syrup as an alternative, though it may slightly affect the sweetness and texture. Just ensure that the substitute maintains similar moisture levels to keep the mixture cohesive.
Why didn’t my recipe turn out as expected?
Common issues can arise from mismeasuring ingredients or not allowing the mixture to cool enough before cutting. Following each step carefully will help achieve the best results with these granola bars.
Final Thoughts
Making chewy homemade granola bars can be a straightforward and enjoyable process that brings wholesome snacks to your kitchen. The balance of flavors and textures creates a satisfying treat that can be shared or savored alone. With a bit of patience and practice, this recipe can easily become a staple in your routine. Enjoy the comfort of homemade goodness in every bite.

Chewy Homemade Granola Bars
Ingredients
Base Mixture
- 6 tablespoons unsalted butter provides richness and moisture
- 6 tablespoons brown sugar, packed adds sweetness and a hint of caramel flavor
- 2/3 cup honey contributes sweetness and helps bind ingredients
Dry Ingredients
- 3 cups rolled oats provides bulk and chewy texture
- 1 1/2 cups Rice Krispies cereal adds crunch and lightness
- 1/2 cup graham crackers, crushed in pieces and crumbs gives a slight sweetness and texture
- 1/2 teaspoon salt enhances overall flavor
Mix-ins
- 1/2 cup mini chocolate chips adds sweetness and richness
- 1/2 cup cereal marshmallows introduces chewiness and a hint of sweetness
Instructions
Preparation
- Begin by melting the unsalted butter in a saucepan over low heat.
- Once the butter is melted, add the packed brown sugar and stir until creamy.
- Pour in the honey and mix well, then remove from heat.
- In a large mixing bowl, combine rolled oats, Rice Krispies, crushed graham crackers, and salt.
- Gradually pour the melted mixture into the bowl and fold everything together until all dry ingredients are coated.
- Fold in the mini chocolate chips and cereal marshmallows gently.
Assembly & Cooling
- Line a baking dish with parchment paper and transfer the granola mixture into the dish.
- Press down firmly to compact the mixture, creating a uniform layer.
- Let it cool at room temperature for at least an hour.
- Once cooled, lift out using the parchment paper and cut into bars or squares.


