
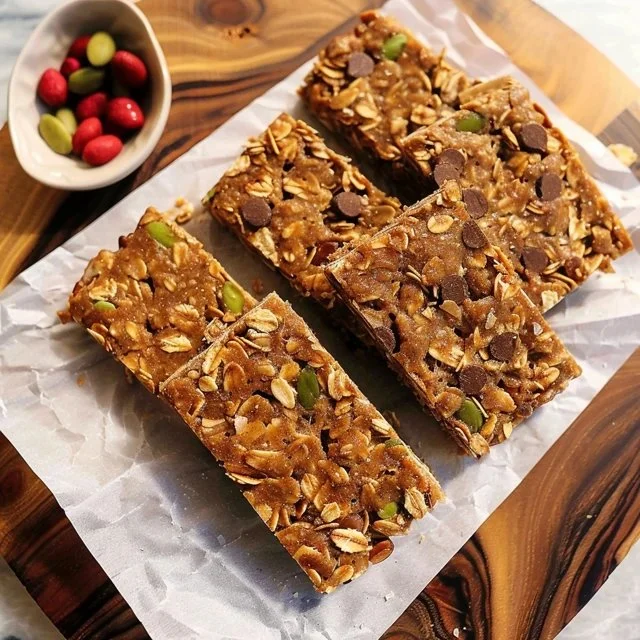
In busy moments, a homemade treat can bring some calm and comfort. These granola bars are simple to prepare and offer a satisfying combination of chewy and crunchy textures. They’re great for weekday breakfasts, weekend snacks, or just a little something to enjoy during quiet times. Flexibility is key, allowing you to customize them based on your tastes. Whether on their own or paired with a cup of tea, these bars make for a reliable pick-me-up. Let’s get started on this easy recipe.
Why You’ll Love This Easy Homemade Granola Bars
These granola bars are not just easy to make; they are also a comforting choice that balances flavor and nutrition. With their hearty ingredients, they fit perfectly into everyday life, whether you’re looking for a quick snack or something to round out breakfast. Each bite offers reliability and satisfaction, making them a wonderful addition to your routine.
Kitchen Tools You’ll Need
- Mixing bowl
- Spoon or spatula
- Baking dish
- Parchment paper
Ingredients
- 1 ¾ cups old-fashioned oats or quick-cooking oats (provides a hearty base)
- 1 teaspoon ground cinnamon (adds warmth and flavor)
- ½ teaspoon fine sea salt (enhances overall taste)
- 2 cups mix-ins (nuts, seeds, chocolate, shredded coconut or dried fruit) (adds texture and variety)
- 1 cup creamy peanut butter or almond butter (binds the ingredients and adds creaminess)
- ½ cup honey or maple syrup (provides sweetness and moisture)
- 1 teaspoon vanilla extract (adds depth to the flavor)

How to Make Easy Homemade Granola Bars
Step 1. Start by gathering the oats in a large mixing bowl. If you’re using old-fashioned oats, they will give the bars a chewier bite, while quick-cooking oats will create a softer texture. Mix in the ground cinnamon and fine sea salt to evenly distribute these flavors throughout the mixture.
Step 2. Next, add your choice of mix-ins to the oat mixture. Whether you go with nuts, seeds, chocolate, shredded coconut, or dried fruit, consider how each one contributes to the bars’ texture and flavor. Stir everything together thoroughly until each piece is coated with the dry ingredients.
Step 3. In a separate bowl, combine the creamy peanut butter or almond butter with honey or maple syrup. This mixture needs to be well blended. The combination not only sweetens the bars but also acts as a binding agent. Watch for a smooth consistency that makes it easy to mix with the oats.
Step 4. Pour the peanut butter and honey mixture into the mixing bowl with the oats. Use a spoon or spatula to fold it in gently. Make sure everything is well combined and coated, ensuring no dry oats are left and that the mixture feels consistently moist.
Step 5. Next, prepare your baking dish by lining it with parchment paper, leaving some overhang for easy removal later. Transfer the oat mixture into the dish, pressing it down firmly to create an even layer. This helps the bars hold together better once they’re cut.
Step 6. Once the mixture is evenly pressed, place the baking dish in the refrigerator for about an hour. Chilling gives the granola bars a chance to set, making them easier to cut into squares. After this time, check for firmness; they should feel solid but not hard.
Step 7. After the chilling period, take the dish out of the fridge and lift the granola mixture out using the parchment paper. Place it on a cutting board and slice it into the desired shapes. Aim for evenly sized bars to ensure consistent serving sizes.
Step 8. Finally, store the granola bars in an airtight container. They can be kept at room temperature for a few days or in the refrigerator for longer freshness. Enjoy them whenever you need a quick snack or breakfast on the go!

Serving Suggestions
These homemade granola bars can be enjoyed in various ways. They make an excellent breakfast option, providing a good source of energy to start your day. As a snack, they work well for children after school or for adults needing a pick-me-up. You can also cut them into smaller pieces to serve at family meals or gatherings. If leftovers remain, they remain a practical choice for packed lunches or a light dessert.
Pro Tips for Best Results
- Make sure to blend the peanut butter or almond butter thoroughly with the sweetener for even sweetness.
- Press the mixture firmly into the baking dish to help the bars maintain their shape.
- Allow the bars to chill the full hour for better setting and cutting.
- Experiment with ratios of mix-ins to suit your taste preferences.
- Store the bars in a cool place to maintain their consistency and freshness.
- Keep an eye on the cutting size to help with portion control.
Common Mistakes to Avoid
- Not pressing the mixture firmly: If the mixture isn’t compacted, the bars may crumble when cut. Take the time to press it down well in the pan.
- Using too many mix-ins: Adding too many mix-ins can disrupt the balance of ingredients, leading to bars that don’t hold together. Stick to the recommended amount for the best results.
- Skipping the chilling step: Not chilling the bars affects how well they set. It’s important to let them cool to allow the ingredients to bond together.
- Overbaking the mixture: If you place them in an oven (while not called for in this recipe), baking too long can dry them out. Focus on the chilling technique for best texture.
- Cutting them too soon: If the bars are cut before they’re properly set, they may fall apart. Be patient and allow the cooling time for easier slicing.
- Storing incorrectly: Failing to store the bars in an airtight container can lead to them becoming stale. Ensure proper storage for a longer shelf life.
Variations & Substitutions
- Swap out the peanut butter for sun butter if you have nut allergies.
- Use maple syrup in place of honey for a vegan-friendly option.
- Replace the cinnamon with nutmeg or a pinch of ginger for a different flavor profile.
- Consider adding protein powder to boost the nutritional content if desired.
- For an extra crunch, add a tablespoon of chia seeds or flaxseeds.
Storage & Reheating
These granola bars can be stored at room temperature in an airtight container for up to a week. For longer shelf life, place them in the refrigerator, where they can last for about two weeks. If you want to freeze them, wrap each bar individually in plastic wrap and then place them in a freezer-safe bag. To enjoy after freezing, simply let them sit at room temperature for a bit before eating, as this will help restore their texture.
Frequently Asked Questions
Can I make this recipe ahead of time?
Yes, these granola bars are perfect for making ahead. Once they’re chilled and set, you can store them for a while without losing flavor or texture.
How long does it last in the fridge?
In the refrigerator, these bars can last for about two weeks when stored in an airtight container, maintaining their freshness.
Can I freeze this recipe?
Absolutely! For longer storage, wrap each bar individually and freeze them. They can be enjoyed right from the freezer or after a little thawing.
What can I substitute for one ingredient?
You can substitute honey with maple syrup for a vegan option, or replace peanut butter with another nut or seed butter of your choice.
Why didn’t my recipe turn out as expected?
If the bars didn’t hold together, it could be due to not pressing the mixture firmly enough or not allowing them to chill adequately. Ensure you follow the steps closely for best results.
Final Thoughts
Making these granola bars is a simple process that yields delicious results. They embody the kind of comforting treat that you can rely on at any time of day. With a little time for preparation and cooling, you’ll have nutritious bars ready for your busy life. Enjoy the satisfaction of creating something wholesome and versatile for you and your family.

Granola Bars
Ingredients
Base Ingredients
- 1.75 cups old-fashioned oats or quick-cooking oats Provides a hearty base
- 1 teaspoon ground cinnamon Adds warmth and flavor
- 0.5 teaspoon fine sea salt Enhances overall taste
- 2 cups mix-ins (nuts, seeds, chocolate, shredded coconut or dried fruit) Adds texture and variety
Binding Ingredients
- 1 cup creamy peanut butter or almond butter Binds the ingredients and adds creaminess
- 0.5 cup honey or maple syrup Provides sweetness and moisture
- 1 teaspoon vanilla extract Adds depth to the flavor
Instructions
Preparation
- Start by gathering the oats in a large mixing bowl, then mix in the ground cinnamon and fine sea salt.
- Add your choice of mix-ins to the oat mixture and stir everything together thoroughly.
- In a separate bowl, combine the peanut butter or almond butter with honey or maple syrup until well blended.
- Pour the peanut butter and honey mixture into the mixing bowl with oats and fold gently.
- Prepare your baking dish by lining it with parchment paper and transfer the oat mixture, pressing it down firmly.
Chilling and Cutting
- Chill the mixture in the refrigerator for about an hour to set.
- Lift the granola mixture out using the parchment paper and slice into bars.
Storage
- Store the granola bars in an airtight container, keeping them at room temperature for a few days or in the refrigerator for a longer freshness.


