
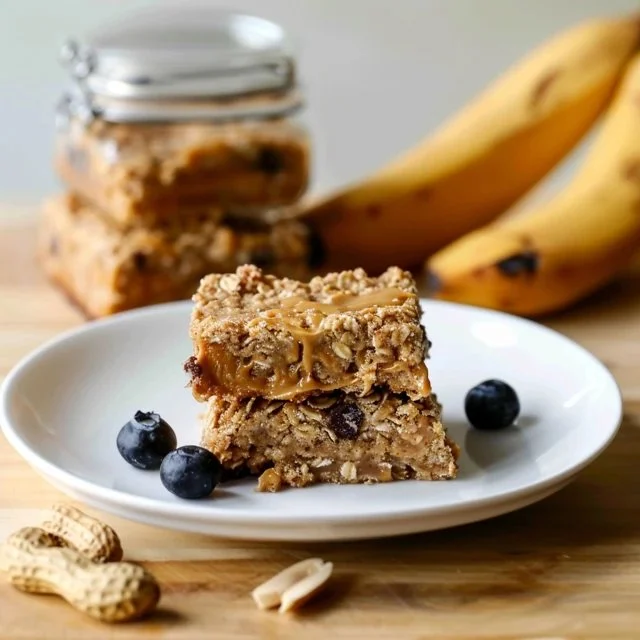
There’s something comforting about a wholesome snack you can whip up quickly at home. These Banana Peanut Butter Oat Bars are perfect for enjoying at any time: a mid-morning snack, an afternoon pick-me-up, or even as a sweet treat during family gatherings. They bring together the natural sweetness of bananas and the creaminess of peanut butter, making them not just delicious but also conveniently simple to prepare. Let’s dive into this easy recipe that promises comfort and satisfaction.
Why You’ll Love This Banana Peanut Butter Oat Bars
These Banana Peanut Butter Oat Bars bring together ease and reliability, making them a favorite for busy days. The combination of ripe bananas and peanut butter creates a balanced flavor that feels like home. They offer practical value for everyday eating, whether you need a quick breakfast or an energizing snack. This recipe is straightforward, focusing on flavors that blend seamlessly together, inviting you to savor each bite.
Kitchen Tools You’ll Need
- Mixing bowl
- Spoon or spatula
- Baking dish
Ingredients
- 2 medium ripe bananas (adds moisture and sweetness)
- 1/2 cup natural creamy peanut butter (provides creaminess and flavor)
- 1/2 cup pure maple syrup (adds sweetness and moisture)
- 3 Tbsp. coconut oil, melted (or avocado oil) (contributes to texture)
- 1/2 tsp. vanilla extract (enhances overall flavor)
- 2 cups old-fashioned rolled oats (gives structure and chewiness)
- 2 scoops collagen protein (~20g) (or protein powder of choice) (boosts protein content)
- 1/2 cup chocolate chips (or cacao nibs or dried fruit if making vegan) (adds sweetness and flavor)
- 1/4 cup finely chopped walnuts (optional) (provides crunch and flavor)
- 1/4 tsp. kosher salt (balances sweetness)

How to Make Banana Peanut Butter Oat Bars
Step 1. Begin by preheating your oven to the appropriate temperature, which will help ensure that your bars cook evenly. Prepare a baking dish by lightly greasing it or lining it with parchment paper to make for easy removal later on. This first step is about getting everything ready for a smooth baking process.
Step 2. In a mixing bowl, mash the ripe bananas thoroughly with a fork until they form a smooth consistency. This process not only breaks down the bananas but also incorporates their natural sweetness into the mixture, setting a solid foundation for the bars. You want to ensure there are no large chunks remaining.
Step 3. Add the creamy peanut butter, melted coconut oil, and maple syrup to the mashed bananas in the mixing bowl. Stir until it’s well combined, creating a rich, creamy mixture. This blend combines moisture and flavor, ensuring that every bar will be tasty and satisfying.
Step 4. Stir in the vanilla extract, blending it into the mixture. The vanilla adds a hint of warmth and depth to the overall flavor profile, enhancing the natural sweetness of the bananas and the richness of the peanut butter. Mix gently until fully incorporated.
Step 5. Gradually fold in the rolled oats, ensuring they are evenly distributed throughout the wet mixture. The oats will give the bars their chewy texture and help bind all the ingredients together. Make sure to mix thoroughly so that every bite contains a good amount of oats.
Step 6. Next, add in your chosen protein powder and mix until it’s well blended. This step is crucial for adding an extra boost of nutrition to your bars. Make sure there are no clumps of powder remaining in the mixture for an even texture throughout the bars.
Step 7. Gently fold in the chocolate chips (or your chosen substitute) and walnuts, if using. This addition brings in delightful bursts of flavor and texture. Carefully combine everything without over-mixing to preserve the integrity of the chocolate and nuts.
Step 8. Pour the mixture into the prepared baking dish, spreading it out evenly with a spatula. It’s essential to smooth the top to ensure even cooking and a consistent texture across the bars. Patting down the mixture slightly may help everything stick together better.
Step 9. Bake in the oven until they turn golden brown and the center feels firm to the touch. Check for visual cues of doneness, like the edges pulling away from the pan slightly. This indication shows they’re ready to come out, and you can begin to get excited about the sweet treat awaiting you.
Step 10. Once baked, let them cool in the baking dish for a while before cutting them into bars. Cooling helps them set properly, making them easier to slice. Aim for a comfortable environment—at room temperature is the best way to maintain the texture before enjoying.

Serving Suggestions
These Banana Peanut Butter Oat Bars are versatile and can easily fit into various routines. Enjoy them for breakfast on busy mornings when you need something quick and nutritious. They also make a satisfying snack during the day, perfect for keeping energy levels up without the added guilt. If you’re hosting family or friends, these bars can be a wonderful dessert, offering a sweet finish to a meal. Additionally, leftovers can be stored for later, making them a reliable option for quick treats.
Pro Tips for Best Results
- Make sure your bananas are truly ripe, as this enhances the sweetness and flavor of the bars.
- Use natural peanut butter without added sugars or oils for the best taste and texture.
- To ensure even baking, spread the mixture into the baking dish evenly and gently press down.
- Let the bars cool completely before cutting to prevent them from crumbling.
- Use a sharp knife for cutting to get clean edges.
- Customize the mix-ins based on personal preferences but keep an eye on proportions for consistent results.
Common Mistakes to Avoid
- Using underripe bananas: They won’t provide enough sweetness or moisture, leading to dense bars. Always choose medium to fully ripe bananas for the best results.
- Not mashing the bananas well: Leaving large chunks can result in uneven texture in the bars. Ensure you mash them until smooth for consistency.
- Skipping the cooling step: Cutting too soon can lead to crumbly bars. Allowing them to cool helps them set properly, yielding cleaner cuts.
- Overmixing the batter: This can lead to tough bars. Mix just until ingredients are combined to keep a tender texture.
- Not greasing the baking dish: Without this step, the bars may stick, making it difficult to remove them later. Use oil or parchment paper for easy release.
- Ignoring storage guidelines: Storing them improperly can lead to sogginess or spoilage. Keep in mind how you plan to store them to maintain freshness.
Variations & Substitutions
Feel free to adjust the mix-ins to suit your taste. You can use raisins or dried cranberries instead of chocolate chips for a healthier option. If you’re looking to increase the nutty flavor, consider adding a tablespoon of chia seeds or flaxseeds. For a more decadent treat, sprinkle some sea salt on top before baking to enhance the sweetness.
Storage & Reheating
Store the banana oat bars at room temperature in an airtight container for up to 3 days. For longer freshness, they can be kept in the refrigerator for up to a week. If freezing, place them in a sealed bag or container, where they’ll keep for up to a month. To enjoy them warm again, simply reheat them in the microwave for about 15-20 seconds. This method helps restore their soft texture while keeping the flavors intact.
Nutrition Information
- Calories: 190
- Total Fat: 8g
- Saturated Fat: 2g
- Carbohydrates: 25g
- Fiber: 3g
- Sugar: 10g
- Protein: 5g
- Sodium: 50mg
Frequently Asked Questions
Can I make this recipe ahead of time?
Absolutely! These bars can be made in advance, making them a great option for meal prep. Just store them properly and enjoy them throughout the week.
How long does it last in the fridge?
If stored in an airtight container, these bars can last in the fridge for up to a week while maintaining taste and texture.
Can I freeze this recipe?
Yes, they freeze well. Wrap them individually or place them in a container, and they can last for up to a month in the freezer.
What can I substitute for one ingredient?
If you need to replace the peanut butter, almond butter works well for a similar texture and flavor. Just ensure it’s smooth and creamy for the best results.
Why didn’t my recipe turn out as expected?
Common issues may arise from not using ripe bananas or not mixing enough. Always follow the steps carefully and check for visual cues of doneness to ensure a good outcome.
Final Thoughts
Making these Banana Peanut Butter Oat Bars offers a relaxed yet rewarding experience in the kitchen. The process is straightforward, allowing the natural flavors to shine through with each bite. They’re not just easy to prepare but also serve as a comforting option for a variety of occasions. Enjoy them in your daily routine, and feel confident in the delightful treat you’ve created.

Banana Peanut Butter Oat Bars
Ingredients
Main Ingredients
- 2 medium ripe bananas adds moisture and sweetness
- 1/2 cup natural creamy peanut butter provides creaminess and flavor
- 1/2 cup pure maple syrup adds sweetness and moisture
- 3 Tbsp. coconut oil, melted or avocado oil, contributes to texture
- 1/2 tsp. vanilla extract enhances overall flavor
- 2 cups old-fashioned rolled oats gives structure and chewiness
- 2 scoops collagen protein (~20g) or protein powder of choice, boosts protein content
- 1/2 cup chocolate chips or cacao nibs or dried fruit if making vegan, adds sweetness and flavor
- 1/4 cup finely chopped walnuts optional, provides crunch and flavor
- 1/4 tsp. kosher salt balances sweetness
Instructions
Preparation
- Preheat your oven to the appropriate temperature and prepare a baking dish by lightly greasing it or lining it with parchment paper.
- In a mixing bowl, mash the ripe bananas thoroughly with a fork until they form a smooth consistency.
- Add the creamy peanut butter, melted coconut oil, and maple syrup to the mashed bananas in the mixing bowl. Stir until well combined.
- Stir in the vanilla extract and mix gently until fully incorporated.
- Gradually fold in the rolled oats, ensuring they are evenly distributed throughout the wet mixture.
- Add in your chosen protein powder and mix until well blended.
- Gently fold in the chocolate chips and walnuts, if using.
- Pour the mixture into the prepared baking dish, spreading it out evenly with a spatula.
- Bake in the oven until golden brown and the center feels firm to the touch.
- Let them cool in the baking dish before cutting them into bars.


