
Making homemade granola bars is a simple way to enjoy a wholesome snack that’s perfect for any time of day. These peanut butter granola bars are easy to prepare, making them great for weeknights, busy weekends, or quiet moments when you want something comforting. Their flexible nature means they work well as a satisfying snack or a quick breakfast on the go. With only three ingredients, this recipe is both practical and comforting. Let’s dive into how you can make these delicious bars.
Why You’ll Love This Peanut Butter Granola Bars
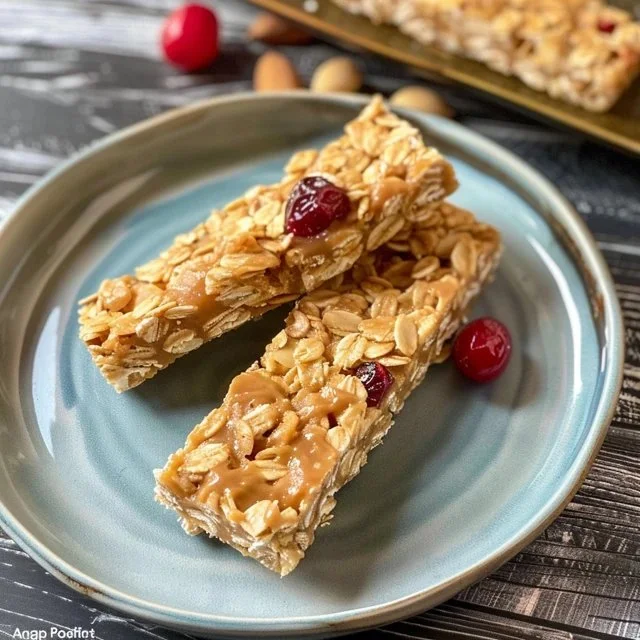
These peanut butter granola bars are incredibly easy and reliable, perfect for busy days when you want something nutritious without fuss. The combination of peanut butter and maple syrup creates a balanced sweetness and a rich, comforting flavor. With gluten-free rolled oats, they offer a satisfying chew that helps keep you full. This recipe brings practical everyday value, making it a great addition to your snack rotation.
Kitchen Tools You’ll Need
- Mixing bowl
- Baking dish
- Parchment paper or non-stick spray
- Spoon or spatula
Ingredients
- 1 cup smooth peanut butter (creamy texture, adds richness)
- ½ cup pure maple syrup (natural sweetness and moisture)
- 2 ½ cups gluten-free rolled oats (chewy texture, provides structure)

How to Make Peanut Butter Granola Bars
Step 1. Start by gathering your ingredients. In a mixing bowl, combine the smooth peanut butter and pure maple syrup. The peanut butter will contribute a creamy texture, while the maple syrup adds sweetness and moisture to the mix. Stir them together until the mixture is smooth and well combined, ensuring there are no lumps.
Step 2. Once your peanut butter and maple syrup are mixed, gradually add the gluten-free rolled oats to the bowl. Stir thoroughly to ensure the oats are evenly coated with the peanut butter and maple syrup mixture. This ensures each bite will have the same delicious flavor and chewy consistency.
Step 3. Line a baking dish with parchment paper or lightly coat it with non-stick spray. This will help with easy removal once your granola bars are set. Transfer the oat mixture into the prepared baking dish, pressing it down firmly. Aim for an even layer to ensure consistent texture throughout the bars.
Step 4. After pressing the mixture down, smooth the top with the back of your spatula or spoon. This will create a nice surface for the bars. Let the mixture rest at room temperature for about an hour, which will help it firm up. You can also place it in the refrigerator to speed up the process.
Step 5. Once the granola mixture has firmed up, remove it from the baking dish by lifting the parchment paper. Place it on a cutting board and cut into bars of your preferred size. Aim for uniformity to ensure even portions for snacks or breakfasts. This also makes it easy to grab and go.
Step 6. Finally, store the bars in an airtight container at room temperature or in the refrigerator if you prefer a firmer texture. They can also be individually wrapped for easy snacking on busy days or packed in lunchboxes. Enjoy your homemade peanut butter granola bars anytime!

Serving Suggestions
These peanut butter granola bars make a great addition to your breakfast routine. They are quick to grab on busy mornings when a sit-down meal isn’t possible. As a snack, they are perfect for keeping energy levels up throughout the day, whether you’re at home or on the go. They can also be shared during family meals or gatherings, providing a simple sweet treat everyone will enjoy. Leftovers can be kept easily for an indulgent after-meal snack or a late-night craving.
Pro Tips for Best Results
- Press Firmly: Make sure to press the oat mixture down firmly; this helps the bars hold together better when cut.
- Uniform Size: Cut the bars into uniform sizes for consistent snacking and portion control.
- Cool Completely: Allow the bars to cool completely before cutting to prevent crumbling.
- Storage Options: Consider wrapping individual bars in plastic wrap for easy grab-and-go snacks.
- Use Fresh Ingredients: Always use fresh peanut butter and maple syrup for the best flavor.
Common Mistakes to Avoid
- Not Pressing Firmly Enough: If the mixture isn’t pressed down well, the bars may fall apart when cut. Ensure you press the oats firmly into the baking dish.
- Skipping Cooling Time: Cutting the bars before they’re fully cooled may lead to a crumbly texture. Let them sit until set to ensure stability.
- Using Chunky Peanut Butter: Chunky peanut butter can affect the texture of the bars and make them harder to cut. Stick with smooth peanut butter for the best results.
- Not Measuring Ingredients Accurately: Incorrect measurements can throw off the consistency and flavor. Use proper measuring cups for accuracy.
- Not Storing Properly: If not stored in an airtight container, the bars may dry out over time. Keep them sealed to maintain freshness.
- Skipping Parchment Paper: Not lining the baking dish can make it difficult to remove the granola bars. Parchment paper is essential for easy lifting and cutting.
Variations & Substitutions
- Add Nuts or Seeds: For added crunch and nutrition, consider mixing in some chopped nuts or seeds with the oats.
- Incorporate Dried Fruit: Dried fruit can add natural sweetness and texture. Add it in when mixing in the oats.
- Use Different Nut Butters: If you prefer another nut butter, such as almond or cashew, feel free to substitute smooth nut butters in place of peanut butter.
Storage & Reheating
To store your granola bars, keep them in an airtight container at room temperature for a few days. For longer storage, the refrigerator works well and helps maintain their texture. If you choose to freeze them, wrap each bar individually in plastic wrap and then place them in a freezer-safe bag for up to three months. When ready to enjoy, allow them to thaw at room temperature or warm them slightly in the microwave to bring back some softness.
Frequently Asked Questions
Can I make this recipe ahead of time?
Yes, these granola bars are an excellent option for meal prep. You can make them in advance and store them for snacks or breakfast throughout the week.
How long does it last in the fridge?
Stored in an airtight container, these granola bars can last up to a week in the refrigerator while still maintaining freshness.
Can I freeze this recipe?
Absolutely! These granola bars freeze well. Just make sure they’re tightly wrapped or stored in a freezer-safe container.
What can I substitute for one ingredient?
If you need to substitute, you can use another smooth nut butter in place of peanut butter, but the flavor and texture will change slightly.
Why didn’t my recipe turn out as expected?
Common issues often stem from improper measurements or not pressing the oat mixture firmly enough. Make sure to measure accurately and press well for the best results.
Final Thoughts
Making peanut butter granola bars at home is an enjoyable and rewarding experience. They come together with minimal effort and offer a satisfying snack option that’s both wholesome and versatile. Having these bars ready for busy days or quiet moments brings a sense of ease to daily routines. You can feel good about providing a simple treat that tastes great and meets your needs. Enjoy making these easy bars whenever you crave something comforting and nourishing.

Peanut Butter Granola Bars
Ingredients
Main Ingredients
- 1 cup smooth peanut butter creamy texture, adds richness
- ½ cup pure maple syrup natural sweetness and moisture
- 2 ½ cups gluten-free rolled oats chewy texture, provides structure
Instructions
Preparation
- In a mixing bowl, combine the smooth peanut butter and pure maple syrup until the mixture is smooth and well combined.
- Gradually add the gluten-free rolled oats to the bowl and stir thoroughly until the oats are evenly coated.
- Line a baking dish with parchment paper or lightly coat it with non-stick spray.
- Transfer the oat mixture into the prepared baking dish, pressing it down firmly to create an even layer.
- Smooth the top with a spatula or spoon and let the mixture rest at room temperature for about an hour or refrigerate to speed up the process.
- Once set, lift the mixture out by the parchment paper, place on a cutting board, and cut into bars of your preferred size.
- Store the bars in an airtight container at room temperature or in the refrigerator for a firmer texture.


