
There’s something comforting about baking, especially when it involves a quick and simple recipe that fills your home with warmth and sweetness. This chocolate chip bread is a great choice, whether you’re coming in from a busy day or enjoying a quiet weekend morning. Perfect for gatherings or just a snack during family meals, it’s a recipe you’ll want to turn to time and again. The straightforward steps and reliable flavor make it a delightful addition to your baking repertoire. Let’s get started.
Why You’ll Love This Chocolate Chip Bread
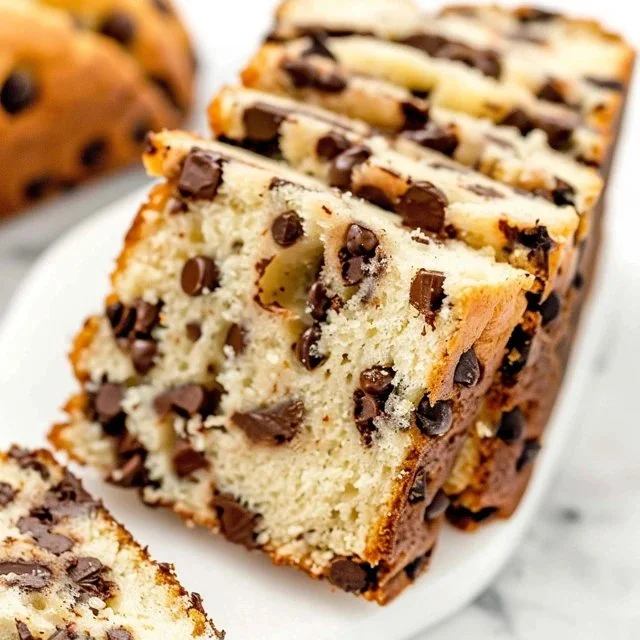
This chocolate chip bread is easy to mix together, making it a reliable choice for your baking needs. You’ll appreciate the balanced sweetness and comforting texture that chocolate chips bring to each slice. It fits seamlessly into everyday life, perfect for breakfast or snacks. The practicality of this recipe ensures you’ll enjoy it often without any fuss.
Kitchen Tools You’ll Need
- Mixing bowl
- Whisk or fork
- Loaf pan
- Measuring cups and spoons
Ingredients
- 1 cup white granulated sugar or light brown sugar (adds sweetness and moisture)
- 2 cups all-purpose flour (provides structure and texture)
- 1 tablespoon baking powder (helps the bread rise)
- ½ teaspoon salt (enhances flavor)
- 1 large egg (binds ingredients and adds richness)
- 1 cup milk (vitamin D, whole, 2% or almond) (adds moisture and flavor)
- ⅓ cup vegetable oil (keeps the bread moist)
- 1½ cups chocolate chips (semi-sweet, milk chocolate, or dark chocolate) (adds sweetness and melting richness)

How to Make Chocolate Chip Bread
Step 1. Begin by preheating your oven to 350°F. Preheating is essential as it ensures your bread bakes evenly. While the oven warms up, prepare your loaf pan by greasing it to prevent sticking. A well-greased pan allows for easy removal of the bread once it’s baked, maintaining its shape and texture.
Step 2. In a mixing bowl, whisk together the sugar and egg until well combined. This step creates a creamy mixture that will contribute to the overall sweetness and provide a nice structure to the bread. You’ll want to mix until it looks smooth and has lightened slightly in color.
Step 3. Gradually add milk and vegetable oil to the egg and sugar mixture, whisking until everything is fully incorporated. The milk gives moisture and a softness to the bread, while the oil enhances its tenderness. Ensure there are no lumps in the batter; a smooth consistency is key for even baking.
Step 4. Next, sift together the flour, baking powder, and salt in a separate bowl. This helps to aerate the flour and evenly distribute the baking powder and salt, ensuring an even rise. Take a moment to break up any clumps in the flour for a lighter finished loaf.
Step 5. Pour the dry ingredients into the wet mixture, folding them together gently. Use a spatula or wooden spoon to combine until there are just a few streaks of flour remaining. Overmixing can lead to a dense bread, so stop mixing as soon as the flour is incorporated to keep it light and airy.
Step 6. Gently fold in the chocolate chips until they are evenly distributed throughout the batter. The chips will melt slightly during baking, creating pockets of chocolate that add flavor and texture to the bread. Ensure even spreading so each slice has a good amount of chips.
Step 7. Transfer the batter into the prepared loaf pan, smoothing the top with a spatula. This ensures even baking and a pleasing shape. Give the pan a gentle tap on the counter to remove any air bubbles that may have formed. A well-prepped pan will improve the overall look of the finished bread.
Step 8. Place the loaf pan in the oven and bake until golden brown. A toothpick inserted into the center should come out clean with only a few moist crumbs. You’ll notice a pleasant aroma filling your kitchen as the bread bakes, indicating it’s nearing completion.
Step 9. Once baked, remove the pan from the oven and allow the bread to cool in the pan for a few minutes. This helps prevent the edges from becoming too firm. After cooling, gently turn the bread out onto a wire rack to cool completely. Cooling on the rack ensures it doesn’t become soggy on the bottom.
Step 10. Slice and serve the chocolate chip bread once it’s completely cool. You can enjoy it plain or with a spread of butter. Each slice will reveal the soft texture and delightful chocolatey goodness within, ready for any time of day.

Serving Suggestions
This chocolate chip bread is wonderfully versatile, making it a great choice for breakfast. Enjoy a slice with your morning coffee or serve it as a satisfying snack during the day. It can also be a delightful addition to family meals or a sweet treat after dinner. The leftovers can be stored for later, keeping the bread as a tasty option for any time cravings.
Pro Tips for Best Results
- Make sure all your ingredients are at room temperature, as this ensures they blend together smoothly.
- For added flavor, consider using a mix of chocolate chips, such as semi-sweet and milk chocolate.
- Avoid overmixing the batter once the flour is added; it can lead to a dense loaf.
- Store the bread in an airtight container to maintain its freshness and moisture.
- If the top browns too quickly, you can lightly cover it with foil while baking.
Common Mistakes to Avoid
- Overmixing the batter: This can cause your bread to become tough. Mix until just combined to maintain a light texture.
- Using cold ingredients: Cold milk or eggs can lead to an uneven batter. Always use room-temperature ingredients for a consistent mix.
- Not greasing the pan properly: If the pan isn’t greased well, the bread may stick. Proper greasing or using parchment paper ensures easy release.
- Skipping the cooling period: Slicing the bread too soon can cause it to crumble. Allow it to cool properly to set the texture.
- Using too much flour: Measuring flour incorrectly can lead to a dry bread. Always spoon flour into your measuring cup without packing it down.
- Storing it improperly: Storing in a non-airtight container can dry the bread out. Use an airtight seal to keep it fresh longer.
Variations & Substitutions
Consider adding nuts, such as walnuts or pecans, for a different texture and flavor. You might also swap out some of the chocolate chips for dried fruit, like cranberries or raisins, to add a hint of tartness. Adjust the sugar slightly if you prefer a less sweet loaf, especially when using sweet chocolate varieties.
Storage & Reheating
You can store your chocolate chip bread at room temperature in an airtight container for up to three days. If you want to keep it for longer, consider refrigerating it, where it will last about a week. For storage in the freezer, wrap the bread tightly in plastic wrap and then in foil. It can be kept in the freezer for up to three months. When reheating, place slices in a toaster or warm them gently in the oven to preserve their texture.
Frequently Asked Questions
Can I make this recipe ahead of time?
Yes, you can prepare the batter in advance and store it in the fridge for a day or bake it ahead and store the cooled bread at room temperature for a couple of days.
How long does it last in the fridge?
When stored properly in an airtight container, chocolate chip bread can last for about a week in the refrigerator, keeping its flavor and moisture.
Can I freeze this recipe?
Absolutely! You can freeze the bread tightly wrapped. It will maintain its quality for up to three months. Just thaw it at room temperature or in the refrigerator before serving.
What can I substitute for one ingredient?
If you need to substitute the egg, you can use ¼ cup of unsweetened applesauce or a mashed banana for a similar binding effect.
Why didn’t my recipe turn out as expected?
Common issues may include overmixing, improper measuring of flour, or not using fresh ingredients. Make sure to follow measurements and steps carefully for the best results.
Final Thoughts
Making chocolate chip bread is a straightforward process that yields comforting results suitable for any occasion. With its soft texture and delightful flavor, it’s ideal for family breakfasts, snacks, or even a simple dessert. Enjoy every slice knowing you’ve created something easy and satisfying that can be shared with loved ones. There’s warmth in the simple act of baking, and this recipe is an inviting way to share that with others.

Chocolate Chip Bread
Ingredients
Dry Ingredients
- 2 cup all-purpose flour provides structure and texture
- 1 tbsp baking powder helps the bread rise
- ½ tsp salt enhances flavor
- 1 cup white granulated sugar or light brown sugar adds sweetness and moisture
Wet Ingredients
- 1 large egg binds ingredients and adds richness
- 1 cup milk adds moisture and flavor
- ⅓ cup vegetable oil keeps the bread moist
Add-ins
- 1½ cup chocolate chips semi-sweet, milk chocolate, or dark chocolate adds sweetness and melting richness
Instructions
Preparation
- Preheat your oven to 350°F and grease your loaf pan.
- In a mixing bowl, whisk together the sugar and egg until creamy.
- Gradually add milk and vegetable oil to the egg and sugar mixture, whisking until fully incorporated.
- Sift together the flour, baking powder, and salt in a separate bowl, breaking up any clumps.
- Pour the dry ingredients into the wet mixture, folding gently until just combined.
- Gently fold in the chocolate chips.
Baking
- Transfer the batter into the prepared loaf pan, smoothing the top and tapping to remove air bubbles.
- Bake until golden brown, with a toothpick coming out clean.
- Allow the bread to cool in the pan for a few minutes before turning out onto a wire rack to cool completely.
Serving
- Once cool, slice and serve the chocolate chip bread plain or with butter.


