
After a long day, there’s something satisfying about winding down with a comforting dessert. These brownies bring together the rich flavor of chocolate with the unmistakable crunch of Kit Kats, creating a delightful treat perfect for any occasion. Whether you’re enjoying them on a quiet weekend or bringing them to a gathering, their simplicity and deliciousness make them a reliable choice. Let’s dive into this straightforward recipe that invites joy into your kitchen.
Why You’ll Love This Kit Kat Brownies
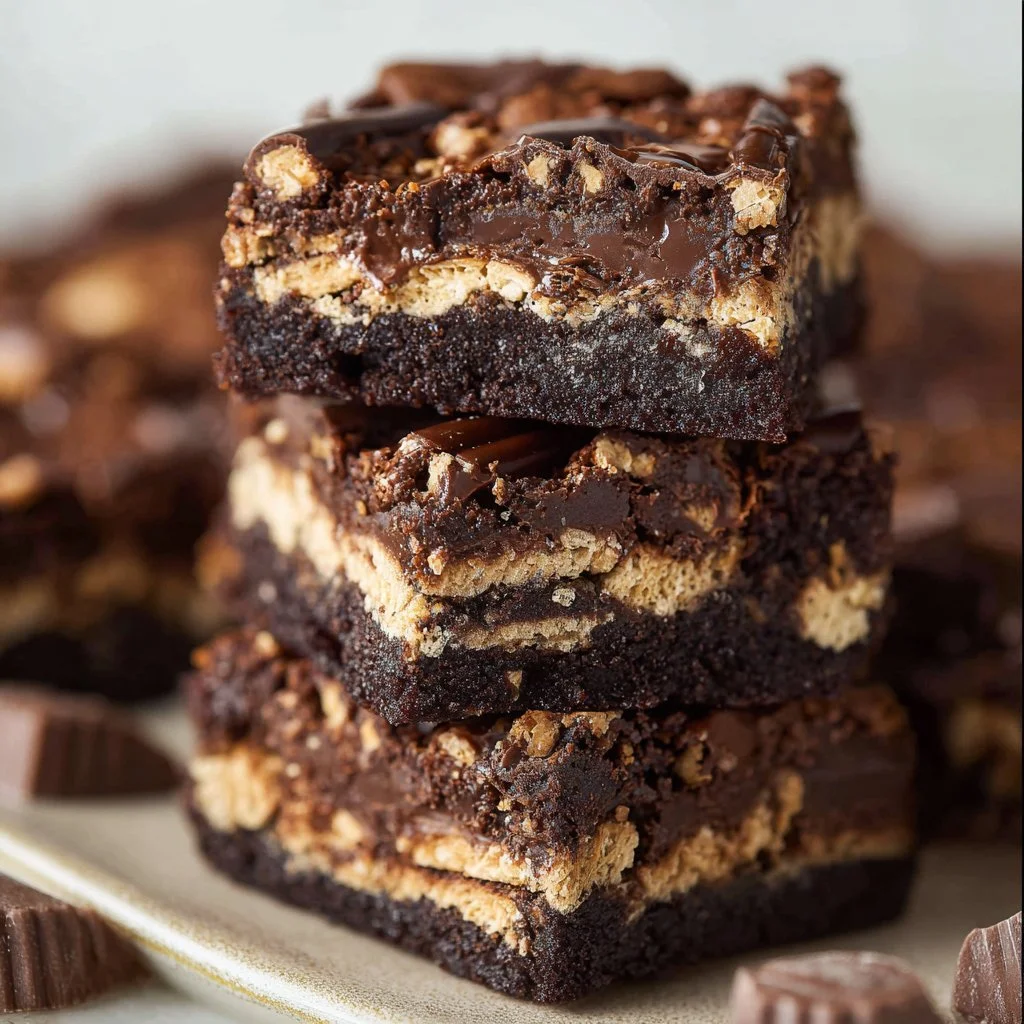
These Kit Kat Brownies stand out for their ease and reliability, making them perfect for busy weekdays or relaxed weekends. The fudgy texture, paired with the layered chocolate and crunchy Kit Kat bits, delivers a balanced flavor that’s sure to please. Their practical nature means you can whip them up anytime, providing a reliable dessert option that brings a bit of comfort to your everyday life.
Kitchen Tools You’ll Need
- Mixing bowl
- Whisk
- Baking pan
- Spatula
Ingredients
- Semi-sweet chocolate chips (adds richness and sweetness)
- Cocoa powder (enhances chocolate flavor)
- Eggs (provides structure and moisture)
- Espresso powder (deepens chocolate flavor)
- Baking powder (helps brownies rise)
- Kit Kats (adds crunch and sweetness)
- Granulated sugar (sweetens the batter)
- Vanilla extract (enhances overall flavor)
- Butter (contributes to moisture and richness)
How to Make Kit Kat Brownies
Step 1. Begin by preheating your oven to the temperature specified in your recipe instructions. This step is crucial for ensuring the brownies bake evenly. While your oven heats up, prepare your baking pan. Be sure to grease it or line it with parchment paper to prevent sticking, which makes the brownies easier to remove later.
Step 2. In a mixing bowl, combine the semi-sweet chocolate chips and butter. Melt them together gently using a microwave or a stovetop method. Stir until the mixture is smooth and glossy. This step forms the base of your brownies, contributing both moisture and a rich chocolate flavor that will be prevalent throughout.
Step 3. Next, add the granulated sugar to the melted chocolate mixture. Mix thoroughly to combine, ensuring that the sugar dissolves well. This step creates a sweet foundation while helping to incorporate air into the batter, essential for a chewy brownie texture.
Step 4. Crack in the eggs one at a time, whisking after each addition. This helps to build a cohesive and velvety batter. The eggs also play a vital role in providing structure to the brownies, supporting their fudgy consistency.
Step 5. Stir in the vanilla extract, blending it into the batter. The vanilla adds depth to the flavor profile, balancing the sweetness of the sugar and chocolate. Ensure it is evenly distributed for a consistent flavor throughout the brownies.
Step 6. In a separate bowl, whisk together the cocoa powder, baking powder, and espresso powder. This step allows the dry ingredients to mix well and evenly distribute, preventing any clumps in your final batter. Each of these ingredients contributes to the overall chocolate intensity and texture.
Step 7. Gradually add the dry mixture to the wet mixture, stirring gently until just combined. Be careful not to overmix at this stage, as doing so can lead to denser brownies. You want the batter to be smooth and well-blended, yet still retain a bit of a thick texture.
Step 8. Chop the Kit Kats into smaller pieces, if not using mini versions, and fold them into the brownie batter. The pieces should be evenly distributed to ensure that every bite contains that delightful crunch and chocolatey goodness.
Step 9. Pour the brownie batter into your prepared baking pan, smoothing it out evenly using a spatula. This step is important for even baking, which will create a consistent texture throughout the brownies. Take care to spread the batter to the edges of the pan.
Step 10. Place the pan in the preheated oven and bake for the time specified in your instructions. Keep an eye on the brownies as they bake, watching for a slightly firm top and the edges pulling away from the sides of the pan. They should retain a soft center for that classic brownie texture.
Step 11. Once baked, remove the brownies from the oven and allow them to cool in the pan. Cooling them properly helps them set, making them easier to cut after they have cooled to room temperature.

Serving Suggestions
These Kit Kat Brownies make for a versatile treat, suitable for various occasions. They’re a great choice for breakfast when paired with coffee or tea, offering a sweet start to the day. As snacks, they can satisfy a midday sweet tooth or serve as a delightful end to a family meal. If you have any leftovers, they can easily be packed for lunch or enjoyed as an after-school treat. Their appeal and flexibility make them an excellent addition to your dessert rotation.
Pro Tips for Best Results
- Use room-temperature eggs for better incorporation into the batter.
- Melt the butter and chocolate carefully to prevent burning.
- Be mindful of baking time; every oven is different, so check for doneness a few minutes before the suggested time.
- Allow the brownies to cool completely for cleaner cuts and better texture.
- Store any leftovers in an airtight container to keep them fresh longer.
Common Mistakes to Avoid
- Not preheating the oven. This can lead to uneven baking. Always preheat to ensure the brownies cook properly from the start.
- Overmixing the batter. This can make the brownies tough. Mix just until combined to maintain a fudgy texture.
- Using cold eggs. Cold ingredients can cause the batter to curdle. Let eggs sit at room temperature before using.
- Not greasing the pan. This can result in stuck brownies. Use parchment paper or grease the pan well to avoid this issue.
- Baking too long. Overbaking can lead to dry brownies. Check for doneness a few minutes before the end of the suggested baking time.
- Skipping the cooling step. Cutting into brownies while they’re warm can result in a messy serving. Allow them to cool completely for the best results.
Variations & Substitutions
For a twist, consider adding nuts for an added crunch or swapping in different chocolate types like dark or milk chocolate chips. You could also create layered brownies by adding a layer of cream cheese or a flavored frosting on top after they cool. Adjusting the quantity of Kit Kats can enhance the crunchiness, providing a variety of textures to enjoy.
Storage & Reheating
Store the brownies at room temperature in an airtight container for up to three days. If you’d like to keep them longer, they can also be refrigerated for up to a week. For longer storage, consider freezing them in a sealed bag or container, where they can last for up to three months. When ready to enjoy, let them thaw at room temperature, or gently reheat them in the microwave for a few seconds to restore some of their initial fudginess.
Frequently Asked Questions
Can I make this recipe ahead of time?
Yes, you can prepare the brownies a day or two ahead of time. They actually taste great after a day as the flavors have a chance to meld. Just store them in an airtight container at room temperature.
How long does it last in the fridge?
In the refrigerator, the brownies can last for up to a week. Make sure they are in an airtight container to keep them from drying out.
Can I freeze this recipe?
Absolutely! You can freeze the brownies for up to three months. Slice them before freezing for convenient individual servings, and wrap them securely to avoid freezer burn.
What can I substitute for one ingredient?
If you’re out of eggs, you can use applesauce or a mashed banana as a substitute, but the texture may vary slightly. Just keep in mind it might affect the overall consistency.
Why didn’t my recipe turn out as expected?
There can be many reasons, from incorrect oven temperatures to not measuring ingredients accurately. It’s always helpful to double-check your measurements and bake times.
Final Thoughts
Making these Kit Kat Brownies can become a comforting ritual, one that brings a bit of warmth and sweetness into your home. Their straightforward preparation allows for easy enjoyment, whether shared with family or savored alone. Trust that with a little patience, you’ll create a delicious treat that will satisfy your chocolate cravings. Enjoy the simple pleasure of baking and sharing, knowing that this recipe is here for you whenever you need a delightful dessert.

Kit Kat Brownies
Ingredients
Brownie Base
- 1 cup Semi-sweet chocolate chips Adds richness and sweetness
- 1/2 cup Butter Contributes to moisture and richness
- 1 cup Granulated sugar Sweetens the batter
- 2 large Eggs Provides structure and moisture
- 1 teaspoon Vanilla extract Enhances overall flavor
Dry Ingredients
- 1/2 cup Cocoa powder Enhances chocolate flavor
- 1 teaspoon Baking powder Helps brownies rise
- 1 teaspoon Espresso powder Deepens chocolate flavor
Add-ins
- 4 pieces Kit Kats Adds crunch and sweetness
Instructions
Preparation
- Preheat your oven to 350°F (175°C). Grease or line your baking pan with parchment paper.
- In a mixing bowl, combine the semi-sweet chocolate chips and butter. Melt them together until smooth.
- Add the granulated sugar to the melted chocolate mixture and mix thoroughly.
- Crack in the eggs one at a time, whisking after each addition.
- Stir in the vanilla extract until well combined.
- In a separate bowl, whisk together the cocoa powder, baking powder, and espresso powder.
- Gradually add the dry mixture to the wet mixture, stirring gently until just combined.
- Chop the Kit Kats into smaller pieces and fold them into the brownie batter.
Baking
- Pour the brownie batter into your prepared baking pan, smoothing it out evenly.
- Bake in the preheated oven for 20-25 minutes, or until the top is firm and the edges pull away from the sides.
- Allow the brownies to cool in the pan before cutting into pieces.


