
After a busy morning or a long workday, there’s something delightfully simple about a bar that can be enjoyed at any time. These Sourdough Breakfast Oatmeal Jam Bars are just the answer for those moments when you crave something comforting and easy to prepare. They fit perfectly into your routine, whether it’s a weekday breakfast, a snack during the day, or a sweet treat to share with friends on the weekend. This recipe allows for flexibility in tastes while delivering dependable comfort in every bite. Let’s dive into making these bars together.
Why You’ll Love This Sourdough Breakfast Oatmeal Jam Bars
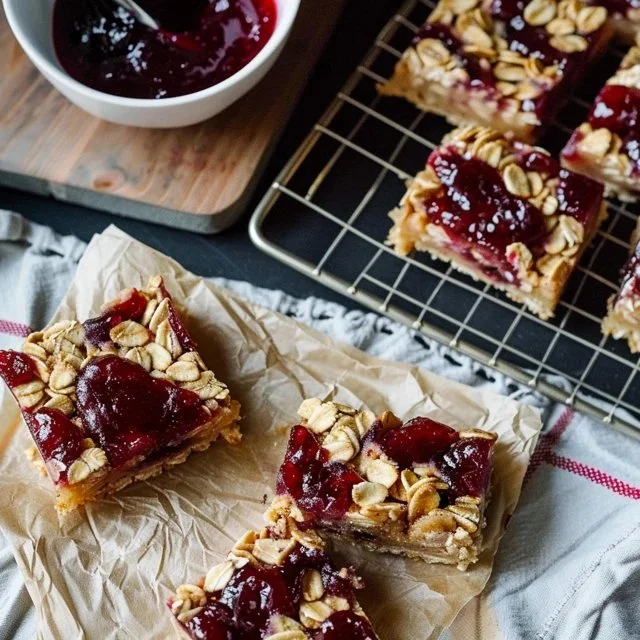
You’ll appreciate how easy and reliable these bars are to make, fitting seamlessly into your everyday routine. The combination of oats and sourdough discard provides a satisfying texture, while the sweetness from the honey and jam balances the flavors beautifully. These Sourdough Breakfast Oatmeal Jam Bars are not just for breakfast; they serve practical purposes throughout the day, too.
Kitchen Tools You’ll Need
- Mixing bowls
- Baking pan
- Spoon or spatula
- Oven
Ingredients
- 1 cup sourdough discard (adds moisture and a slight tang)
- 1 ½ cups rolled oats (provides hearty texture)
- 1 cup all-purpose flour (structural base)
- ½ cup honey (natural sweetness)
- ½ cup unsalted butter, melted (moisture and richness)
- ½ teaspoon baking soda (leavening agent)
- ¼ teaspoon salt (enhances flavor)
- ¾ cup fruit jam (strawberry, raspberry, or your favorite) (adds sweetness and moisture)
- ½ cup chopped nuts (optional) (adds crunch and flavor)

How to Make Sourdough Breakfast Oatmeal Jam Bars
Step 1. Preheat your oven to the appropriate temperature and prepare your baking pan by greasing it lightly or lining it with parchment paper. This ensures that your bars will come out easily and prevents sticking, which is helpful for a clean presentation when you serve them.
Step 2. In a large mixing bowl, combine the sourdough discard, rolled oats, all-purpose flour, honey, melted butter, baking soda, and salt. Stir everything together until the mixture is evenly combined, taking care to incorporate any lumps from the flour. You want a cohesive dough with no dry spots.
Step 3. Once your dough is well mixed, fold in the chopped nuts if you’re using them. They’ll provide a lovely texture contrast to the soft bars. Gently mix until they are evenly distributed—it’s okay if there are little clumps.
Step 4. Pour half of the mixture into your prepared baking pan, spreading it out evenly to create a base layer. Use a spatula to press it down lightly so that it adheres well to the bottom of the pan, creating a solid foundation for the jam layer.
Step 5. Spoon the fruit jam of your choice over the pressed oat mixture, spreading it evenly for consistent sweetness throughout. This layer adds both flavor and moisture, which makes the bars delightful and not too dry.
Step 6. Finally, add the remaining oat mixture on top of the jam layer. Gently drop spoonfuls of the mixture over the jam, then carefully spread it out to cover it completely. It doesn’t need to be perfect; just aim for an even layer that encapsulates the jam.
Step 7. Place the pan in the oven and bake until the top is lightly golden and firm to the touch. You can check for doneness by lightly pressing the top; it should spring back a bit and not feel very soft.
Step 8. Once baked, remove the pan from the oven and let it cool completely in the pan before slicing. This step is important for achieving clean cuts when you cut the bars, preventing them from falling apart.

Serving Suggestions
These bars are incredibly versatile. Try them warm or at room temperature as a satisfying breakfast option, or serve them at snack time for a little pick-me-up. They also make great additions to family meals or can be packed for a day out. Feel free to store leftovers; they hold up well for days, making them a practical choice for meal prep.
Pro Tips for Best Results
- Use a consistent type of jam to ensure flavor integration throughout the bars.
- Allow the bars to cool completely before cutting, which helps maintain their structure.
- Adjust the sweetness by choosing a jam with a flavor you love, as this will impact the overall taste.
- If your dough feels too dry, incorporate a small splash of water or milk to reach the desired consistency.
- For a crunchier texture, slightly toast the nuts before adding them to the mixture.
- Ensure the baking pan is adequately greased or lined to avoid sticking.
Common Mistakes to Avoid
- Overmixing the dough: This can result in tough bars. Mix just until combined for tender results.
- Not pressing the base layer: If the base isn’t compacted well, the bars can crumble. Make sure to press it down firmly.
- Using the wrong baking pan size: Using a pan that’s too small can lead to overflow. Stick to the recommended size for the best outcome.
- Skipping the cooling phase: Cutting too soon can cause the bars to fall apart. Patience leads to better slices.
- Using too much jam: A thick layer can make the bars overly sweet and gooey. Stick to the recommended amount for balance.
- Not checking for doneness: Avoiding visual checks can lead to underbaking. Look for a lightly golden top and a firm texture.
Variations & Substitutions
You can customize these bars based on your preferences. Consider swapping in different flavors of jam for a change of pace. Adding spices like cinnamon or vanilla extract can enhance the flavor profile. For extra nutrition, try incorporating seeds such as chia or pumpkin seeds. If you prefer a nut-free version, simply omit the nuts or substitute sunflower seeds.
Storage & Reheating
Store leftover bars at room temperature in a covered container for up to three days. For longer storage, refrigerate them, where they will last about a week. If you want to freeze them, wrap individual bars tightly and place them in a freezer-safe bag. To reheat, place a bar in the microwave for about 10-15 seconds or until warmed through, which helps restore a bit of that fresh-baked quality.
Frequently Asked Questions
Can I make this recipe ahead of time?
Yes, these bars are perfect for making in advance. You can prepare them and store them at room temperature or in the refrigerator to enjoy throughout the week. They also freeze well, making them convenient for busy mornings.
How long does it last in the fridge?
If stored properly in an airtight container, these bars will last about one week in the fridge. They remain flavorful and enjoyable, making them a great option for meal prep.
Can I freeze this recipe?
Absolutely. You can freeze the bars for up to three months. Just wrap them individually in plastic wrap and store them in a freezer-safe bag. Thaw them in the refrigerator or at room temperature before enjoying.
What can I substitute for one ingredient?
If you don’t have honey, maple syrup works as a good alternative for sweetness. Additionally, you can switch out the fruit jam for a nut butter to change the flavor profile.
Why didn’t my recipe turn out as expected?
Several factors could lead to unexpected results. Ensure you accurately measure your ingredients and follow the steps closely. Adjusting baking times or pan sizes could also affect the final outcome, so be mindful of those details.
Final Thoughts
Making Sourdough Breakfast Oatmeal Jam Bars is a straightforward process that yields satisfying results. These easy-to-follow steps lead to a delicious treat perfect for various occasions—whether you’re enjoying a quiet morning or sharing with family. With their balanced flavors and comforting texture, they are sure to become a staple in your recipe rotation. Enjoy the simple pleasures of cooking and sharing these bars with those you love.


