
There’s something wonderfully simple about making your own snacks at home. Creating a batch of granola bars can easily fit into a weeknight routine or serve as a cozy activity on a weekend—perhaps enjoyed alongside a quiet moment with a warm drink. These bars come together with ease, providing comfort through their chewy texture and balanced flavor. They are flexible enough for gatherings or just for keeping on hand for quick snacks. Let’s dive into how to make these perfectly chewy granola bars.
Why You’ll Love This Perfectly Chewy Granola Bars
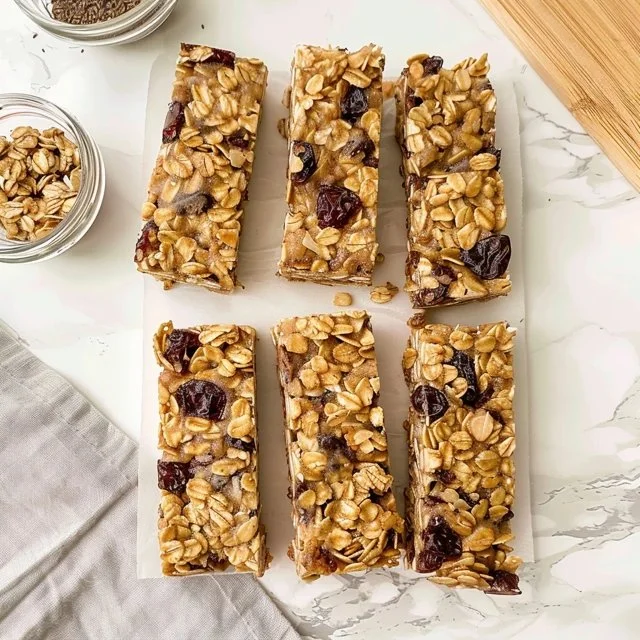
These perfectly chewy granola bars are truly reliable and easy to prepare. They offer a comforting balance of sweetness and texture, making them a great everyday treat. Each bite is both satisfying and enjoyable, making these bars perfect for a quick breakfast or a midday snack. With their mix of oats, honey, and a hint of chocolate, they’re sure to become a staple in your kitchen.
Kitchen Tools You’ll Need
- Mixing bowl
- Spoon or spatula
- 8-inch baking pan
- Parchment paper
Ingredients
- ¼ cup unsalted butter (provides richness and moisture)
- ⅓ cup honey (adds sweetness and binds the ingredients)
- 1 tablespoon light brown sugar (enhances flavor with a hint of caramel)
- 2 cups rolled oats (serves as the base, adding chewiness)
- 1 teaspoon chia seeds (offers a slight crunch and nutrition)
- 1 teaspoon vanilla extract (adds warmth and depth of flavor)
- ¼ teaspoon fine sea salt (balances sweetness)
- ½ cup brown rice cereal (adds texture and light crunch)
- ¼ cup dried cranberries (introduces a tangy sweetness)
- ¼ cup mini chocolate chips (provides a touch of indulgence)

How to Make Perfectly Chewy Granola Bars
Step 1. Begin by preheating your oven and preparing the baking pan. Line an 8-inch baking pan with parchment paper, allowing some overhang. This will help you lift the granola bars out easily after baking. Preheating ensures that once the mixture is ready, it goes into a hot oven for even cooking.
Step 2. In a medium saucepan, melt the unsalted butter over low heat. Stir in the honey and light brown sugar until well combined and smooth, creating a syrupy mixture. The melting process should take just a few moments, and you’ll know it’s complete when everything is well blended, with no sugar granules visible.
Step 3. Once the butter mixture is ready, remove it from the heat and add the rolled oats, chia seeds, vanilla extract, and fine sea salt. Stir everything together until the oats are evenly coated with the syrup. The mixture should look glossy and sticky, indicating that it’s well combined.
Step 4. Next, fold in the brown rice cereal, dried cranberries, and mini chocolate chips. Continue mixing gently until all ingredients are incorporated evenly. You should see a mix of textures at this point, with the cereal adding a nice crunch to the chewy oats.
Step 5. Transfer the mixture to the prepared baking pan, pressing it firmly into an even layer. Use the back of a spoon or your hands to pack it down tightly. This step is crucial for keeping the bars together once baked, so ensure that the mixture is compressed well.
Step 6. Place the pan in the preheated oven and bake until the granola bars are set and slightly golden around the edges. You’ll want to keep an eye on them; the edges should start to look firm while the center remains a bit soft. This accounts for the chewy texture you’re aiming for.
Step 7. After baking, remove the pan from the oven and allow the granola bars to cool completely in the pan. Keep them in the pan to cool for about 15-20 minutes before lifting them out with the parchment paper. This cooling phase will help them firm up further.
Step 8. Once the granola bars have cooled completely, cut them into squares or rectangles, depending on your preferred size. Use a sharp knife for clean edges. This step allows for manageable portions, perfect for snacking or packing.

Serving Suggestions
These granola bars are quite versatile and can be enjoyed in several ways. They work beautifully as a quick breakfast option when you’re on the go. They also make for great midday snacks that can easily satisfy cravings. Consider bringing them along for family outings or weekend adventures; they hold up well and provide an energy boost. Leftovers can be stored for a few days, ready to be grabbed whenever hunger strikes.
Pro Tips for Best Results
- Make sure to pack the mixture tightly in the baking pan; this helps the bars hold together after baking.
- Allow the bars to cool completely before cutting to prevent them from crumbling.
- Use fresh ingredients for the best flavor, particularly the dried fruits and chocolate.
- You can adjust the sweetness by using less honey or brown sugar based on your preference.
- Keep an eye on the baking time; every oven is slightly different, and you want the bars to be set but not overbaked.
Common Mistakes to Avoid
- Not packing the mixture tightly: If the mixture is loose in the pan, the bars may fall apart. Always press it down firmly.
- Using old or stale ingredients: Ingredients like dried cranberries or chocolate chips should be fresh for the best flavor. Stale items can affect the taste and texture.
- Overbaking the bars: Keep an eye on them as they cook. Overbaking can lead to dry, hard bars instead of the chewy texture you want.
- Skipping the cooling time: Cutting too soon can make the bars crumble. Allow the mixture to cool completely to ensure they firm up properly.
- Not adjusting for your oven: Oven temperatures can vary. If the bars are browning too quickly, lower the temperature and check for doneness.
- Using too large of a pan: This will cause the bars to bake too quickly and become too thin. Stick to the recommended size for best results.
Variations & Substitutions
You might consider adding different mix-ins like nuts, seeds, or even a sprinkle of cinnamon for added warmth. Adjust the dried fruits based on your preferences—raisins or chopped dates work beautifully as well. Feel free to use regular chocolate chips or even a mix of dark and milk chocolate for variety.
Storage & Reheating
Once cooled and cut, store the granola bars in an airtight container at room temperature for up to a week. For longer storage, you can keep them in the refrigerator to extend freshness. They can also be frozen, wrapped tightly, for up to three months. When ready to enjoy, let them thaw at room temperature. If desired, you can give them a quick warm-up in the microwave to soften slightly.
Frequently Asked Questions
Can I make this recipe ahead of time?
Absolutely! Granola bars are perfect for meal prep. You can make them a few days in advance and store them for easy access. Just be sure to let them cool completely before cutting and storing.
How long does it last in the fridge?
These bars will last about a week in the refrigerator if stored in an airtight container. They can maintain their texture and flavor quite well during this time.
Can I freeze this recipe?
Yes, these granola bars freeze very well. After cutting, wrap them individually or stack them in a container with parchment paper in between, and freeze for up to three months.
What can I substitute for one ingredient?
If you prefer not to use dried cranberries, consider raisins, apricots, or even chopped nuts. Just keep in mind that it will slightly change the flavor profile.
Why didn’t my recipe turn out as expected?
Common issues can arise from not packing the mixture tightly, overbaking, or using stale ingredients. Checking the freshness of your ingredients and following the packing instructions closely can help avoid these problems.
Final Thoughts
Making perfectly chewy granola bars at home is both straightforward and rewarding. Each bar offers a mix of flavors and textures that can satisfy cravings and provide energy throughout the day. They’re a reliable option for busy times, and enjoying them can be a simple pleasure. Rest assured, this recipe welcomes you into the comforting world of homemade snacks.

Perfectly Chewy Granola Bars
Ingredients
Base Ingredients
- ¼ cup unsalted butter provides richness and moisture
- ⅓ cup honey adds sweetness and binds the ingredients
- 1 tablespoon light brown sugar enhances flavor with a hint of caramel
- 2 cups rolled oats serves as the base, adding chewiness
- 1 teaspoon chia seeds offers a slight crunch and nutrition
- 1 teaspoon vanilla extract adds warmth and depth of flavor
- ¼ teaspoon fine sea salt balances sweetness
- ½ cup brown rice cereal adds texture and light crunch
- ¼ cup dried cranberries introduces a tangy sweetness
- ¼ cup mini chocolate chips provides a touch of indulgence
Instructions
Preparation
- Preheat your oven and prepare the baking pan. Line an 8-inch baking pan with parchment paper, allowing some overhang.
- Melt the unsalted butter in a medium saucepan over low heat. Stir in the honey and light brown sugar until well combined and smooth.
- Remove the butter mixture from heat and add rolled oats, chia seeds, vanilla extract, and fine sea salt. Stir until the oats are evenly coated.
- Fold in brown rice cereal, dried cranberries, and mini chocolate chips. Mix gently until all ingredients are incorporated.
- Transfer the mixture to the prepared baking pan, pressing it firmly into an even layer.
Baking
- Place the pan in the preheated oven and bake until set and slightly golden around the edges.
- Remove the pan from the oven and let the granola bars cool completely in the pan for 15-20 minutes before lifting them out.
Cutting
- Once cooled, cut the granola bars into squares or rectangles depending on your preferred size.


