
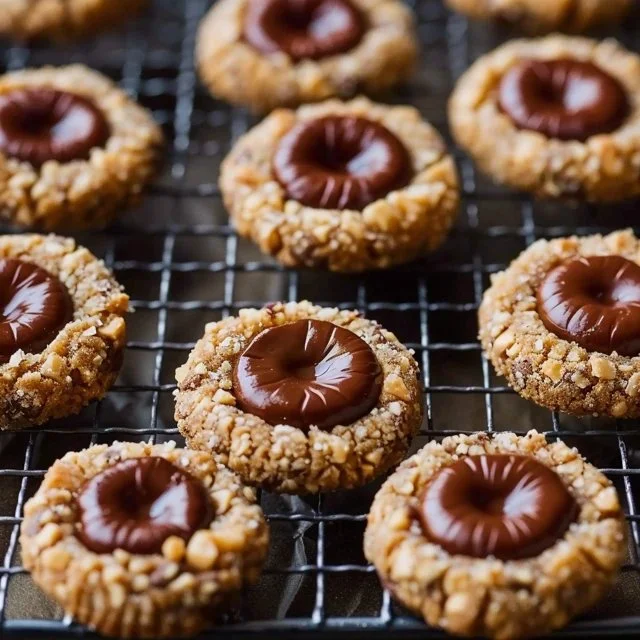
It’s a comforting feeling to come home to a simple yet delightful treat after a long day. These cookies fit perfectly into a quiet moment on the weekend or serve as a sweet surprise during family gatherings. With their rich chocolate flavor and a satisfying crunch from hazelnuts, they’re the kind of cookies that anyone can appreciate. Making these cookies is straightforward, and they offer a wonderful balance of simplicity and comfort. Let’s dive into the recipe.
Why You’ll Love This Chocolate Hazelnut Thumbprint Cookies
These Chocolate Hazelnut Thumbprint Cookies bring together ease and reliability with their straightforward process. They deliver a cozy, rich flavor that’s satisfying for both everyday snacks and special occasions. Their practical nature makes them perfect for sharing or enjoying on your own, highlighting the joy of baking in any home kitchen.
Kitchen Tools You’ll Need
- Mixing bowl
- Baking sheet
- Cookie scoop or tablespoon
- Parchment paper
- Rolling pin (optional)
Ingredients
- 1 cup (2 sticks) unsalted butter, softened (for moisture and richness)
- 2/3 cup granulated sugar (provides sweetness and texture)
- 2 teaspoons vanilla extract (adds flavor)
- 2 cups all-purpose flour (forms the base structure)
- 1/2 cup cocoa powder (contributes chocolate flavor)
- 1/2 teaspoon salt (enhances flavor)
- 1/2 cup hazelnuts, finely chopped (for rolling; adds crunch)
- 1/2 cup chocolate hazelnut spread (such as Nutella; creamy filling)
- Extra whole hazelnuts for garnish (optional)

How to Make Chocolate Hazelnut Thumbprint Cookies
Step 1. Begin by preheating your oven to 350°F. A preheated oven will help the cookies bake evenly, ensuring a nice texture as they rise and spread.
Step 2. In a mixing bowl, combine the softened butter and granulated sugar, beating them together until the texture becomes light and creamy. This should take a minute or two. You’ll know you’re done when the mixture looks fluffy and a bit pale.
Step 3. Add the vanilla extract to the butter-sugar mixture and continue to mix until the ingredients are fully combined. The vanilla will add a warm, inviting aroma and enhance the overall flavor of your cookies.
Step 4. Gradually incorporate the all-purpose flour, cocoa powder, and salt into the bowl. Mix slowly until just combined. The dough will start coming together, and you should see no dry flour left when it’s ready.
Step 5. Take the finely chopped hazelnuts and place them on a plate. Using your hands, shape the cookie dough into small balls, about one inch in diameter. Roll each ball in the chopped hazelnuts to coat them well.
Step 6. Place the coated cookie balls onto a baking sheet lined with parchment paper, spacing them about two inches apart. This ensures they have room to spread as they bake. Aim for a neat arrangement for an appealing final look.
Step 7. Using your thumb or the back of a measuring spoon, create an indentation in the center of each cookie. Be gentle yet firm to create a nice pocket for the chocolate hazelnut spread.
Step 8. Once all the cookies are shaped and indented, spoon a small amount of chocolate hazelnut spread into each indentation. Be careful not to overfill, as this can cause the spread to spill over while baking.
Step 9. Bake the cookies in the preheated oven for 10 to 12 minutes, or until they are set and slightly firm to the touch. Keep an eye on them; they should not look too browned, as you want to maintain their soft, chewy texture.
Step 10. After removing the cookies from the oven, allow them to cool on the baking sheet for a few minutes before transferring them to a wire rack to cool completely. This step helps them firm up without becoming hard.

Serving Suggestions
Chocolate Hazelnut Thumbprint Cookies are versatile and can fit into various moments of your day. They make a delightful breakfast option when paired with coffee or tea. For an afternoon snack, these cookies are perfect to enjoy with milk. They also work well as a sweet dessert for family meals, adding a touch of indulgence. And if there are any leftovers, they store well, making for a quick treat later in the week.
Pro Tips for Best Results
- Ensure your butter is at room temperature for easier mixing and better texture.
- Don’t skip the step of chilling the dough if it feels too sticky; this can help make rolling easier.
- Use a small cookie scoop for uniform cookie sizes, which promotes even baking.
- Keep an eye on the baking time to avoid overbaking; slightly underbaked cookies will firm up as they cool.
- Experiment with different nuts or add-ins for variety, but stick to hazelnuts for the classic flavor.
- Allow the cookies to cool completely before storing to maintain their texture.
Common Mistakes to Avoid
- Not using softened butter: This can result in a dense cookie instead of the light, fluffy texture you want. Make sure your butter is at room temperature before mixing.
- Overmixing the dough: This can lead to tough cookies. Mix just until the dry ingredients are combined to keep the texture tender.
- Skipping the indentation step: If you don’t create a well in the center, the chocolate spread won’t stay in place. Be sure to form a nice pocket to hold the filling.
- Overfilling the chocolate spread: Too much filling can spill over while baking, making a mess. Use just a small spoonful to fill each indent.
- Not letting cookies cool: Moving them too soon can cause breakage. Allow some cooling time on the baking sheet before transferring them to a wire rack.
- Baking at the wrong temperature: If your oven isn’t properly preheated, cookies might not bake evenly. Always check the oven temperature for consistent results.
Variations & Substitutions
For a different flavor profile, consider using almond flour for part of the all-purpose flour, which will give the cookies a subtle nutty taste. You could also swap the chocolate hazelnut spread for a fruit jam or preserve for a fruity twist. If you enjoy spices, a pinch of cinnamon in the dough could enhance the flavor without introducing new ingredients.
Storage & Reheating
Store your Chocolate Hazelnut Thumbprint Cookies at room temperature in an airtight container for up to five days. If you’d like to keep them longer, they can be refrigerated in a sealed container for about a week. For freezing, layer the cookies between parchment paper in an airtight container. When you want to enjoy them, simply let them thaw at room temperature or warm them slightly in the microwave for a few seconds to refresh their texture.
Frequently Asked Questions
Can I make this recipe ahead of time?
Yes, you can prepare the dough ahead and refrigerate it for up to 24 hours. This makes it convenient for baking later. Just let it come back to a manageable temperature before rolling and baking.
How long does it last in the fridge?
These cookies can last in the fridge for about a week when stored properly in an airtight container. This keeps them fresh and ready to enjoy at your convenience.
Can I freeze this recipe?
Absolutely! You can freeze the baked cookies or the unbaked dough. For cookies, place them in a labeled container. For dough, wrap it tightly in plastic wrap. Thaw them overnight in the fridge before baking, or enjoy baked cookies straight from the freezer.
What can I substitute for one ingredient?
For the butter, you can use margarine or a dairy-free alternative if needed. Just ensure it is softened, similar to unsalted butter, for best results.
Why didn’t my recipe turn out as expected?
There can be several reasons, including incorrect measurements, overmixing, or baking at the wrong temperature. Ensure that all ingredients are measured accurately and that your oven is calibrated for optimal baking conditions.
Final Thoughts
Baking Chocolate Hazelnut Thumbprint Cookies is a straightforward process that brings a delightful flavor and texture to any gathering or quiet afternoon at home. Each cookie merges the richness of chocolate with the satisfying crunch of hazelnuts, making them a reliable favorite. Enjoy the comfort of these cookies, knowing they’re as simple to make as they are delicious.

Chocolate Hazelnut Thumbprint Cookies
Ingredients
Cookie Ingredients
- 1 cup unsalted butter, softened For moisture and richness
- 2/3 cup granulated sugar Provides sweetness and texture
- 2 teaspoons vanilla extract Adds flavor
- 2 cups all-purpose flour Forms the base structure
- 1/2 cup cocoa powder Contributes chocolate flavor
- 1/2 teaspoon salt Enhances flavor
Coating and Filling
- 1/2 cup hazelnuts, finely chopped For rolling; adds crunch
- 1/2 cup chocolate hazelnut spread (e.g., Nutella) Creamy filling
- extra pieces whole hazelnuts for garnish Optional
Instructions
Preparation
- Preheat your oven to 350°F.
- In a mixing bowl, combine the softened butter and granulated sugar, beating them until light and creamy.
- Add the vanilla extract and mix until fully combined.
- Gradually incorporate the all-purpose flour, cocoa powder, and salt into the bowl, mixing slowly until just combined.
- Take the finely chopped hazelnuts and place them on a plate. Shape the cookie dough into small balls, about one inch in diameter, and roll each ball in the chopped hazelnuts.
- Place the coated cookie balls onto a baking sheet lined with parchment paper, spaced about two inches apart.
- Using your thumb or the back of a measuring spoon, create an indentation in the center of each cookie.
- Spoon a small amount of chocolate hazelnut spread into each indentation. Be careful not to overfill.
Baking
- Bake the cookies for 10 to 12 minutes, or until set and slightly firm to the touch.
- Allow the cookies to cool on the baking sheet for a few minutes before transferring them to a wire rack to cool completely.


