
Creating a wholesome treat that everyone enjoys can be a true delight. These granola bars are not only simple to prepare but also provide a satisfying option for various occasions. Whether it’s a weeknight snack, a weekend breakfast, or a healthy bite during gatherings, they fit seamlessly into everyday life. Their comforting combination of flavors and textures make them a reliable choice. Feel free to make them your own as you dive into this recipe.
Why You’ll Love This Recipe easy no bake granola bars
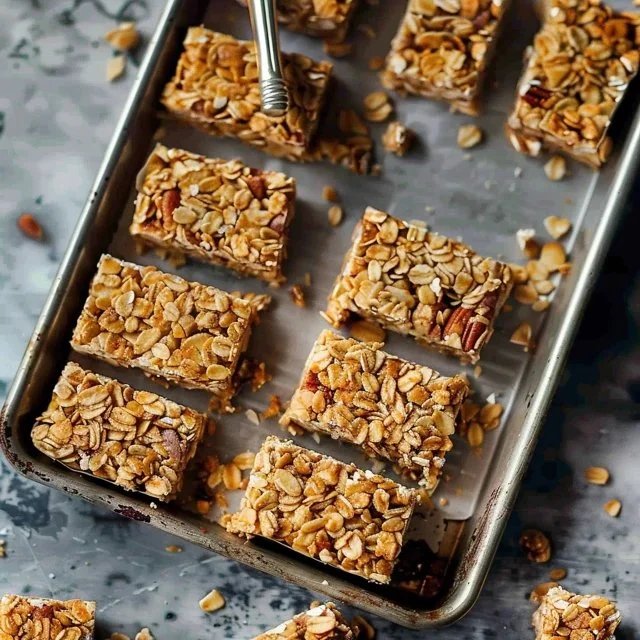
These easy no bake granola bars balance comfort and a rich flavor, making them a dependable addition to your routine. The seamless combination of oats, nuts, and sweetness creates a satisfying snack that’s perfect for any time of day. Their practicality allows for endless customization, while the straightforward process ensures they’ll be a staple in your household.
Kitchen Tools You’ll Need
- Mixing bowl
- Measuring cups and spoons
- Spoon or spatula
- 9×9-inch baking dish or pan
- Plastic wrap or parchment paper
Ingredients
- 2 cups oats (provides a chewy texture)
- 1.5 tsp cinnamon (adds warm flavor)
- 0.75 tsp sea salt (enhances sweetness)
- 2 cups mix-ins (like nuts or seeds, chopped into 1/4-inch pieces for crunch)
- 1.25 cups peanut butter (binds the ingredients and adds creaminess)
- 0.75 cup honey (natural sweetness and moisture)
- 1.5 tsp vanilla (imparts fragrant flavor)

How to Make easy no bake granola bars
Step 1. Begin by gathering all your ingredients and tools on your counter. Measure out 2 cups of oats into a mixing bowl, followed by 1.5 teaspoons of cinnamon and 0.75 teaspoon of sea salt. This blend of dry ingredients sets the foundation for the bars, creating a balanced flavor profile that enhances the other components.
Step 2. Next, add your 2 cups of mix-ins to the oat mixture. This can include chopped nuts or seeds, which should be cut into 1/4-inch pieces to ensure they mix well and add an enjoyable crunch to the bars. Stir gently to distribute the mix-ins evenly throughout the oats.
Step 3. In a separate bowl, combine 1.25 cups of peanut butter, 0.75 cup of honey, and 1.5 teaspoons of vanilla. If you prefer a smoother texture, you can microwave the peanut butter slightly to soften it before mixing. This will help all the ingredients combine easily and create a consistent blend.
Step 4. Pour the peanut butter mixture into the dry ingredients. Use a spoon or spatula to thoroughly mix everything together. Pay attention to how the mixture begins to clump together, making sure that the oats and mix-ins are coated with the sticky blend.
Step 5. Once the mixture is well combined, transfer it to a 9×9-inch baking dish or pan. Gently press the mixture down into an even layer, making it as compact as possible. This step is important for helping the bars hold together when cut, so you might want to use a piece of plastic wrap over the top to press down firmly.
Step 6. Allow the granola bars to set in the refrigerator for at least 1 hour. As they chill, the mixture firms up, making it easier to cut into bars later. Check after an hour to see if they are firm enough to slice.
Step 7. Finally, remove the bars from the dish. If you used plastic wrap or parchment, you can lift them out easily. Carefully cut them into your desired size, typically into squares or rectangles. This recipe yields a satisfying portion for snacking throughout the week.

Serving Suggestions
These granola bars are versatile and can be enjoyed in various ways. They make for a hearty breakfast when paired with yogurt or fresh fruit. As snacks, they are perfect for after-school cravings or midday boosts during work hours. They can also be included in family meals, either as nutritious take-along options for picnics or hikes. Leftovers can be wrapped and stored for easy access throughout the week, making them a convenient and tasty choice.
Pro Tips for Best Results
- Ensure that your mix-ins are cut into small, even pieces to help everything stick together well.
- When pressing the mixture into the pan, make sure it’s compact to avoid crumbly bars.
- Allowing the bars to set in the refrigerator is critical; don’t skip this step for best texture.
- Experiment with different combination of mix-ins like dried fruit or chocolate chips as variations.
- If using natural peanut butter, sometimes oil separation can happen; stir it well before measuring.
- For a sweeter touch, drizzle a little more honey on top before refrigerating.
Common Mistakes to Avoid
- Not compressing the mixture tightly enough: If the ingredients aren’t compacted, the bars may crumble when cut. Press down firmly into the pan.
- Choosing overly large mix-ins: Big chunks can prevent even mixing and cause the bars to fall apart. Cut nuts and seeds into 1/4-inch pieces for optimal texture.
- Not refrigerating long enough: Skipping or shortening the chill time can lead to weak bars. Allow adequate time for the mixture to firm up in the fridge.
- Using expired ingredients: Using oats or nuts past their prime can affect flavor. Always check dates to ensure freshness.
- Ignoring ingredient ratios: Adjusting the ratios can lead to either a dry or too sticky mixture. Stick to the measurements provided for the best results.
- Forgetting to account for salt: Omitting salt can dull the flavor. The small amount added enhances the overall taste of the bars.
Variations & Substitutions
Consider swapping out the peanut butter for almond or cashew butter for a different nutty flavor. If you want to avoid nuts entirely, stick with seeds or use sunflower seed butter. You can also play with the spices, substituting cinnamon with nutmeg or allspice for a unique twist. Sweetness can be adjusted with maple syrup instead of honey, maintaining the natural flavor while offering diversity.
Storage & Reheating
These granola bars can be stored at room temperature in an airtight container for up to a week, ensuring they stay fresh. For longer storage, they are well-suited for the refrigerator, where they can last up to two weeks. If you prefer, freezing is also an option; wrap each bar individually in plastic wrap and place them in a sealed freezer bag for up to three months. To enjoy them after freezing, simply let them thaw at room temperature for a few minutes.
Frequently Asked Questions
Can I make this recipe ahead of time?
Yes, these granola bars are ideal for making in advance. They can be prepared a few days prior to when you plan to enjoy them, making them a convenient option for busy weeks ahead.
How long does it last in the fridge?
When stored properly in an airtight container, they can last up to two weeks in the refrigerator. Just be sure to keep them well-sealed to maintain freshness.
Can I freeze this recipe?
Absolutely. For longer shelf life, wrap individual bars in plastic wrap and store them in a freezer-safe bag. They will be good for about three months in the freezer.
What can I substitute for one ingredient?
If you prefer a different nut butter, feel free to use sunflower seed butter for a nut-free version. Alternatively, maple syrup can replace honey for a different sweetening option.
Why didn’t my recipe turn out as expected?
Results can vary if ingredient ratios are adjusted or if adequate chilling time is not given. Make sure to follow measurements closely and allow enough time to set before cutting.
Final Thoughts
Making these easy no bake granola bars can be a straightforward process that results in delicious, fuss-free snacks. Their versatility and satisfying nature make them perfect for any time of day. Enjoy the simple pleasure of homemade bars that cater to your taste, and feel at ease knowing you have a comforting treat ready at hand.

Easy No Bake Granola Bars
Ingredients
Base Ingredients
- 2 cups oats provides a chewy texture
- 1.5 tsp cinnamon adds warm flavor
- 0.75 tsp sea salt enhances sweetness
- 2 cups mix-ins (nuts or seeds, chopped) cut into 1/4-inch pieces for crunch
- 1.25 cups peanut butter binds the ingredients and adds creaminess
- 0.75 cup honey natural sweetness and moisture
- 1.5 tsp vanilla imparts fragrant flavor
Instructions
Preparation
- Gather all your ingredients and tools on your counter.
- Measure out 2 cups of oats into a mixing bowl, then add 1.5 teaspoons of cinnamon and 0.75 teaspoon of sea salt.
- Add 2 cups of chopped mix-ins to the oat mixture and stir gently.
- In a separate bowl, combine 1.25 cups of peanut butter, 0.75 cup of honey, and 1.5 teaspoons of vanilla.
- Pour the peanut butter mixture into the dry ingredients and mix thoroughly.
- Transfer the mixture to a 9x9-inch baking dish and press it down evenly.
- Allow the bars to set in the refrigerator for at least 1 hour.
- Remove from the dish and cut into bars.


