
Making a batch of cookies can be both a simple pleasure and a wonderful way to bring some joy to your day. These cookies are a playful take on traditional recipes, featuring vibrant colors and a mix of fun textures and flavors. Whether you’re whipping them up on a weeknight, preparing for a weekend gathering, or just enjoying a quiet moment, these cookies are sure to make your time in the kitchen enjoyable. Let’s dive into the details of creating these delightful treats.
Why You’ll Love This Recipe Cookie Monster Cookies
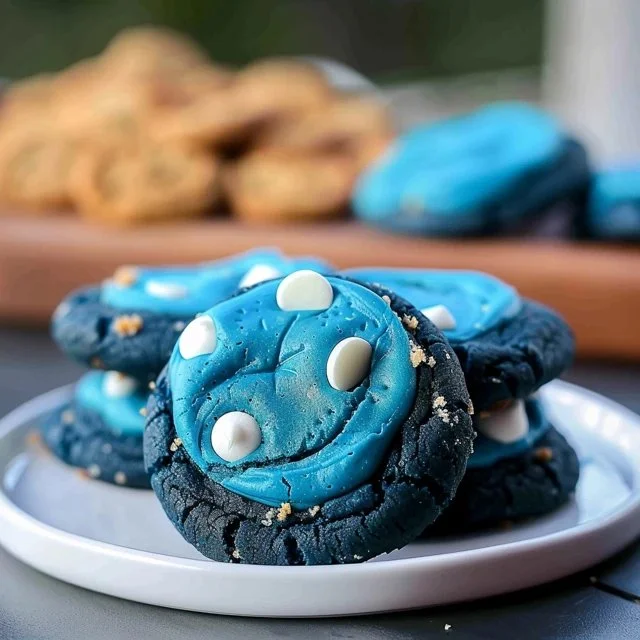
These Cookie Monster Cookies offer a delightful balance of ease and flavor that makes them a dependable go-to for any occasion. With their comforting taste and chewy texture, they cater to both children and adults alike. Their practical everyday value lies in how simple they are to make, while the mix of white chocolate, Oreos, and Chips Ahoy turns them into a fun treat that’s hard to resist.
Kitchen Tools You’ll Need
- Mixing bowls
- Hand mixer or stand mixer
- Baking sheet
- Parchment paper
- Measuring cups and spoons
- Rubber spatula
Ingredients
- 3 cups (360g) all purpose flour (provides structure)
- 2 tsp cornstarch (contributes to texture)
- 1 tsp baking soda (helps cookies rise)
- ¼ tsp salt (enhances flavor)
- 1 cup (226g) unsalted butter, room temperature (adds richness)
- 1 ¼ cups (267g) brown sugar (adds moisture and flavor)
- ¼ cup (50g) granulated sugar (adds sweetness)
- 2 large eggs, room temperature (binds ingredients)
- 1 tsp vanilla extract (enhances flavor)
- Royal blue, electric blue, and violet gel food coloring (for vibrant color)
- ⅔ cup (113g) white chocolate chips, divided (adds sweetness and creaminess)
- ⅔ cup chopped Chips Ahoy cookies (adds crunch and flavor)
- ⅔ cup chopped Oreos (adds a chocolatey twist)

How to Make Cookie Monster Cookies
Step 1. In a large mixing bowl, combine the all-purpose flour, cornstarch, baking soda, and salt. Use a whisk to ensure everything is evenly distributed. This step is important as it ensures that the dry ingredients are well mixed, preventing any clumps in your cookie dough. You want to see a uniform blend of ingredients without any noticeable flecks of white flour or corn starch.
Step 2. In another bowl, beat the unsalted butter, brown sugar, and granulated sugar together until the mixture is light and fluffy. This can take a few minutes using a hand mixer or stand mixer. The goal here is to introduce air into the mix, creating a lighter texture in the cookies. When it starts to look pale and creamy, you know you’re on the right track.
Step 3. Add the eggs and vanilla extract to the butter-sugar mixture. Beat until fully incorporated, which will result in a smoother, more cohesive dough. The mixture should look glossy and unified like a thick batter. This helps to create a rich flavor foundation for your cookies.
Step 4. Gradually add the dry ingredient mixture to the wet ingredients. Use a rubber spatula to mix until just combined; the dough should be thick and slightly sticky, with no visible flour remaining. Make sure not to overmix, as this could lead to tougher cookies. This step allows the flavors to meld together without losing that tender texture you want.
Step 5. Gently fold in the white chocolate chips, chopped Chips Ahoy, and chopped Oreos, ensuring they are well-distributed throughout the dough. The different cookie pieces add texture and flavor, giving each bite a delightful surprise. Aim for an even distribution to ensure every cookie has a bit of each ingredient.
Step 6. Divide the dough into equal portions, roughly two tablespoons each, and place them on a baking sheet lined with parchment paper. Space them a couple of inches apart, as they will spread during baking. The dough should have a smooth appearance with visible chunks of chocolate and cookies peeking through.
Step 7. Bake the cookies until they are golden around the edges but still slightly soft in the center. Watch for visual cues: the edges should look set, while the centers may appear a little underbaked. This ensures your cookies remain chewy and don’t dry out.
Step 8. Allow the cookies to cool on the baking sheet for a few minutes before transferring them to a wire rack. This resting period allows them to firm up and gives you the perfect chewy texture. When they’re ready, they should feel warm and soft to the touch, with just a slight crisp on the edges.

Serving Suggestions
These Cookie Monster Cookies can be enjoyed in various ways, making them a versatile addition to your baking repertoire. They work wonderfully as a sweet breakfast treat when paired with a cup of coffee or tea. For an easy mid-afternoon snack, you can grab one or two for a quick energy boost. They also make a delightful dessert after a family meal, especially when shared around the table. If you have leftovers, pack them up for school lunches or keep them handy for late-night cravings.
Pro Tips for Best Results
- Ensure your butter is at room temperature for optimal mixing and texture.
- Don’t skip chilling the dough for about 30 minutes if it feels too soft; this can help prevent excessive spreading.
- Use a cookie scoop for evenly-sized cookies, which helps them bake more uniformly.
- Avoid overmixing after adding the flour mixture to maintain a tender crumb.
- Adjust baking time based on your oven; cookies can vary slightly in how quickly they bake.
Common Mistakes to Avoid
- Using Cold Butter: Cold butter won’t incorporate well into the sugar, leading to dense cookies. Ensure your butter is softened at room temperature for the best results.
- Overmixing the Dough: Mixing too long after adding flour can develop gluten, resulting in tougher cookies. Stop as soon as the flour is incorporated for a softer texture.
- Incorrect Oven Temperature: Using an oven that’s too hot or too cold can affect cookie baking. An oven thermometer can help ensure accurate baking temperatures.
- Not Measuring Flour Properly: Scooping flour directly from the bag can result in too much being used, affecting the cookie’s texture. Use the spoon and level method for accuracy.
- Skipping the Cooling Step: Letting cookies cool on the baking sheet too long can result in overcooking. Transfer them to a rack to avoid them becoming too firm.
- Not Using Parchment Paper: Baking directly on a sheet can lead to sticking and uneven browning. Parchment helps with easy release and even cooking.
Variations & Substitutions
If you want to mix things up, consider swapping in different kinds of baking chips, like milk or dark chocolate chips, to suit your preference. You can also add nuts for extra crunch or adjust the colors of the food coloring for a fun twist. Every little change can create a different version of these delightful cookies while keeping the spirit of the recipe intact.
Storage & Reheating
Store your cookies at room temperature in an airtight container for up to five days to maintain their chewy texture. If you want them to last longer, you can refrigerate them for up to a week. For extended storage, cookies can also be frozen in a sealed bag or container for up to three months. To enjoy them after freezing, simply allow them to come to room temperature or warm them briefly in the oven to revive their freshness.
Frequently Asked Questions
Can I make this recipe ahead of time?
Yes, you can prepare the dough in advance and refrigerate it for up to two days before baking. This can enhance the flavors, and allows for quick baking whenever you want fresh cookies.
How long does it last in the fridge?
When stored in an airtight container, these cookies can last about a week in the refrigerator. Just make sure to allow them to reach room temperature before enjoying.
Can I freeze this recipe?
Absolutely. These cookies freeze well. After baking, let them cool completely before storing in a freezer-safe bag or container for up to three months.
What can I substitute for one ingredient?
If you want to substitute the butter, you could use equal amounts of margarine or a plant-based butter alternative for a dairy-free option while maintaining similar consistency.
Why didn’t my recipe turn out as expected?
Common issues like incorrect ingredient measurements or baking temperature can lead to unexpected results. Ensuring accurate measurements and monitoring your oven temperature can help improve the outcome.
Final Thoughts
Baking these Cookie Monster Cookies can be a straightforward and rewarding experience, offering a delightful treat that’s simple to prepare at home. Each step in the process reveals delicious anticipation, from mixing to baking and finally enjoying the warm, chewy cookies right out of the oven. It’s a timeless comfort, inviting you to create and savor the moment, one cookie at a time.

Cookie Monster Cookies
Ingredients
Dry Ingredients
- 3 cups all purpose flour provides structure
- 2 tsp cornstarch contributes to texture
- 1 tsp baking soda helps cookies rise
- ¼ tsp salt enhances flavor
Wet Ingredients
- 1 cup unsalted butter, room temperature adds richness
- 1 ¼ cups brown sugar adds moisture and flavor
- ¼ cup granulated sugar adds sweetness
- 2 large eggs, room temperature binds ingredients
- 1 tsp vanilla extract enhances flavor
- Royal blue, electric blue, and violet gel food coloring food coloring for vibrant color
Mix-ins
- ⅔ cup white chocolate chips, divided adds sweetness and creaminess
- ⅔ cup chopped Chips Ahoy cookies adds crunch and flavor
- ⅔ cup chopped Oreos adds a chocolatey twist
Instructions
Preparation
- In a large mixing bowl, combine all-purpose flour, cornstarch, baking soda, and salt. Whisk to ensure even distribution.
- In another bowl, beat the unsalted butter, brown sugar, and granulated sugar together until light and fluffy.
- Add eggs and vanilla extract to the butter-sugar mixture. Beat until fully incorporated.
- Gradually add the dry mixture to the wet ingredients and mix until just combined.
- Gently fold in the white chocolate chips, chopped Chips Ahoy, and chopped Oreos.
Baking
- Divide the dough into equal portions, roughly two tablespoons each, and place them on a baking sheet lined with parchment paper.
- Bake until golden around the edges but slightly soft in the center.
- Allow the cookies to cool on the baking sheet for a few minutes before transferring to a wire rack.


