
There’s something undeniably comforting about the smell of cookies baking in the oven. Those warm, nutty aromas fill the home with a sense of familiarity that can turn an ordinary evening into a special occasion. These cookies are perfect for weeknight treats, weekend baking sessions, or gatherings with family and friends. They embody simplicity in both their preparation and flavor, making them a reliable choice for sharing with loved ones or enjoying in a quiet moment at home. Let’s dive into this classic recipe that has stood the test of time.
Why You’ll Love This Granny’s Classic Peanut Butter Cookies
Granny’s Classic Peanut Butter Cookies are not only easy to whip up, but they also bring a delightful combination of comfort and balanced flavor. The natural richness of the peanut butter ensures every bite is satisfying, creating a treat you can return to whenever you want something wholesome and delicious. These cookies offer great everyday value, whether for a simple snack or a sweet addition to any meal.
Kitchen Tools You’ll Need
- Mixing bowls
- Electric mixer or whisk
- Cookie sheet
- Measuring cups and spoons
- Parchment paper (optional)
Ingredients
- 1 cup unsalted butter, softened (ensures a tender texture)
- 1 1/2 cups peanut butter (no sugar added, crunchy recommended) (adds richness and texture)
- 1 cup granulated sugar (provides sweetness)
- 1 cup brown sugar, packed (adds moisture and depth of flavor)
- 2 large eggs, slightly beaten (binds ingredients and adds moisture)
- 1 tablespoon vanilla extract (enhances overall flavor)
- 2 3/4 cups all-purpose flour (provides structure)
- 1 1/2 teaspoon baking soda (helps with leavening)
- 1 teaspoon baking powder (adds lift)
- 1/2 teaspoon kosher salt (balances sweetness)
- 2 tablespoons sugar for rolling (adds sweetness and texture on the outside)

How to Make Granny’s Classic Peanut Butter Cookies
Step 1. Begin by preheating the oven to your desired temperature. Ensuring the oven is properly heated before baking helps achieve even cooking, giving a nice golden color to the cookies.
Step 2. In a large mixing bowl, cream together the softened butter, peanut butter, granulated sugar, and brown sugar. Use an electric mixer or whisk to blend until the mixture is smooth and fluffy. The combination of the butters and sugars creates a creamy consistency that’s a perfect base for your cookies.
Step 3. Gradually add the slightly beaten eggs and vanilla extract to the mixture. Blend well until everything is fully incorporated. This step is crucial as the eggs help form the cookie’s structure while the vanilla adds a warm, comforting flavor.
Step 4. In another bowl, whisk together the all-purpose flour, baking soda, baking powder, and kosher salt. Mixing these dry ingredients separately helps in evenly distributing the leavening agents before combining them with the wet ingredients.
Step 5. Slowly add the dry ingredients to the peanut butter mixture, stirring until a dough forms. You’ll know it’s ready when there are no dry bits left and the dough feels thick and slightly sticky, indicating the perfect texture for shaping.
Step 6. Once the dough is mixed, scoop it into small balls and roll them in the two tablespoons of sugar. This not only adds a touch of sweetness on the outside but also creates a delightful texture when baked.
Step 7. Place the sugar-coated dough balls onto a cookie sheet lined with parchment paper, leaving space between each ball to allow for spreading. The cookies will expand as they bake, so give them some room.
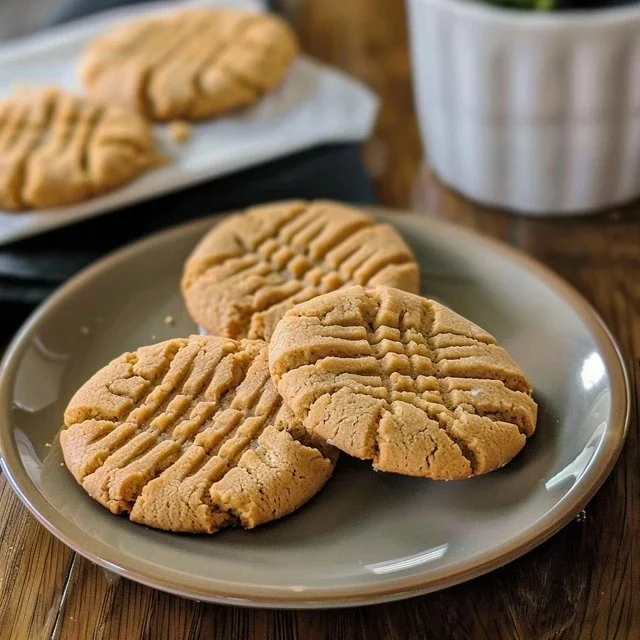
Step 8. Using a fork, gently press down on each dough ball to create a crisscross pattern. This step is traditional and doesn’t just add visual appeal; it also helps the cookies bake evenly.
Step 9. Bake in the preheated oven until the edges are lightly browned, and the centers are set but still soft. Watching for this visual cue is important to avoid overbaking, which can lead to a dry cookie.
Step 10. Once baked, remove the cookies from the oven and let them sit on the cookie sheet for a few minutes. This allows them to firm up slightly before transferring to a wire rack to cool completely.

Serving Suggestions
These cookies are a versatile treat that can fit into various moments of your day. Enjoy them for breakfast alongside a warm cup of coffee or tea. They serve well as a delightful snack during the afternoon or as a sweet dessert after dinner. Leftover cookies can be a tasty addition to lunchboxes or perfect for sharing with family and friends. Their comforting flavor makes them an inviting choice for any gathering, bringing a bit of nostalgia and sweetness to the table.
Pro Tips for Best Results
- Ensure your butter is at room temperature for easier mixing and better texture.
- Don’t skip the sugar rolling step; it adds a lovely exterior crunch.
- Use crunchy peanut butter to enhance texture if desired.
- Make sure to measure flour correctly by spooning it into the measuring cup for consistent results.
- Allow cookies to cool completely for the best texture when storing.
- Experiment with the thickness of the dough balls to vary your cookies’ size and baking time.
Common Mistakes to Avoid
- Using cold butter: If the butter is too cold, it won’t cream properly, leading to a denser cookie. Always soften it beforehand.
- Not measuring flour accurately: Too much flour can make cookies dry and crumbly. Use a spoon to lightly fill the measuring cup and level it off for precision.
- Overmixing the dough: Mixing too much after adding the flour can lead to tough cookies. Just mix until combined.
- Ignoring chilling time: Skipping chilling the dough can cause cookies to spread too much. If needed, chill for 30 minutes before baking.
- Overbaking: Letting cookies bake longer than necessary can lead to a dry texture. Look for a golden edge but slightly soft center.
- Storing in an airtight container too soon: If cookies are stored before cooling completely, they can become soggy. Allow them to cool on a wire rack first.
Variations & Substitutions
Consider adding chocolate chips or chopped nuts for extra flavor and texture. For a twist on flavor, you could also incorporate a bit of cocoa powder to make them chocolate peanut butter cookies. While this recipe is already well-balanced, if you want to experiment, try using natural peanut butter for a different taste profile.
Storage & Reheating
Store the cookies at room temperature in an airtight container for up to a week. If you want to keep them longer, refrigerate them in a sealed container to help maintain freshness. For freezing, place the cookies in a single layer on a baking sheet, freeze until solid, and then transfer them to a freezer-safe bag. Reheat individual cookies in the microwave for about 10 seconds to bring back some of the original softness.
Frequently Asked Questions
Can I make this recipe ahead of time?
Yes, you can prepare the dough in advance and refrigerate it for up to 3 days. When ready to bake, simply scoop and roll into balls, then proceed with baking.
How long does it last in the fridge?
Baked cookies can be stored in the fridge for up to a week in an airtight container. This helps maintain their freshness and flavor.
Can I freeze this recipe?
Absolutely. You can freeze the cookie dough for up to three months. Just shape the dough into balls, freeze on a baking sheet, then transfer to a freezer bag.
What can I substitute for one ingredient?
If you’re looking to substitute the peanut butter, you could try almond butter or cashew butter for a different flavor profile while keeping the same texture.
Why didn’t my recipe turn out as expected?
There are various reasons cookies may not turn out as planned. Common issues include inaccuracies in measuring ingredients, insufficient creaming of butter and sugars, or baking them for too long.
Final Thoughts
The experience of making Granny’s Classic Peanut Butter Cookies is both satisfying and rewarding. This recipe allows for a simple and enjoyable baking process, with delicious results that remind us of home. Gathering around these warm cookies with loved ones or enjoying them solo can create those cherished moments that make everyday life feel a little sweeter. The comfort of simple, homemade treats is sure to brighten your day.

Granny’s Classic Peanut Butter Cookies
Ingredients
Base Ingredients
- 1 cup unsalted butter, softened ensures a tender texture
- 1.5 cups peanut butter (no sugar added, crunchy recommended) adds richness and texture
- 1 cup granulated sugar provides sweetness
- 1 cup brown sugar, packed adds moisture and depth of flavor
- 2 large eggs, slightly beaten binds ingredients and adds moisture
- 1 tablespoon vanilla extract enhances overall flavor
Dry Ingredients
- 2.75 cups all-purpose flour provides structure
- 1.5 teaspoons baking soda helps with leavening
- 1 teaspoon baking powder adds lift
- 0.5 teaspoon kosher salt balances sweetness
- 2 tablespoons sugar for rolling adds sweetness and texture on the outside
Instructions
Preparation
- Begin by preheating the oven to your desired temperature.
- In a large mixing bowl, cream together the softened butter, peanut butter, granulated sugar, and brown sugar until smooth and fluffy.
- Gradually add the slightly beaten eggs and vanilla extract, blending well.
- In another bowl, whisk together the all-purpose flour, baking soda, baking powder, and kosher salt.
- Slowly add the dry ingredients to the peanut butter mixture, stirring until a dough forms.
- Scoop the dough into small balls and roll them in sugar.
- Place the sugar-coated dough balls onto a cookie sheet lined with parchment paper.
- Gently press down on each dough ball with a fork to create a crisscross pattern.
Baking
- Bake in the preheated oven until the edges are lightly browned and the centers are set but still soft.
- Remove the cookies from the oven and let them sit on the cookie sheet for a few minutes before transferring them to a wire rack to cool completely.


